
- Homebrew is a package manager for the Mac.
- To install Homebrew, open terminal and type the following command:
ruby -e "$(curl -fsSL https://raw.githubusercontent.com/Homebrew/install/master/install)"- This will install Homebrew on your Mac. To check the version type the following command:
brew -v- To install Node via Homebrew, type the following command to install Node.
brew install node- To check if you have Node.js installed, run this command in your terminal:
node -v- To confirm that you have npm installed you can run this command in your terminal:
npm -v- To update your npm, type this into your terminal:
npm install npm@latest -gIn this tutorial, we create a test case to test the following flow:
- Go to Google page on Chrome browser on Android device
- Enter Kobiton into Search field
- Click Search button
- Check the title contains Kobiton keyword
To start using Node/npm-based packages on your projects, you need to set up your project directories as npm projects. This is easy to do.
For example, let’s first create a test directory to allow us to play without fear of breaking anything.
-
Create a new directory somewhere sensible with using your file manager UI, or by navigating to the location you want and running the following command:
mkdir kobiton-test
-
To make this directory an npm project, you just need to go inside your test directory and initialize it, with the following:
cd kobiton-test npm init -
This second command will ask you many questions to find out the information required to set up the project; you can just select the defaults for now.
-
Once all the questions have been asked, it will ask you if the information entered is
OK, typeyesand pressEnter/Returnand npm will generate apackage.jsonfile in your directory.
This file is basically a config file for the project. You can customize it, like this:
{
  "name": "kobiton.test",
  "version": "1.0.0",
  "description": "This a sample test",
  "main": "index.js",
  "scripts": {
    "test": "mocha --compilers js:babel-core/register --no-timeouts *.js",
    "android-web-test": "mocha --compilers js:babel-core/register --no-timeouts android-web-test.js"
  },
  "keywords": [
    "kobiton"
  ],
  "author": "Khanh Do",
  "license": "ISC",
  "dependencies": {
    "babel-core": "^6.26.0",
    "babel-plugin-add-module-exports": "^0.2.1",
    "babel-plugin-transform-decorators-legacy": "^1.3.4",
    "babel-plugin-transform-flow-strip-types": "^6.22.0",
    "babel-polyfill": "^6.26.0",
    "babel-preset-es2015": "^6.24.1",
    "babel-preset-stage-0": "^6.24.1",
    "babel-register": "^6.26.0",
    "chai": "^4.1.2",
    "colors": "^1.1.2",
    "mocha": "^4.0.1",
    "wd": "^1.4.1"
  }
}
Note: We need to run npm install to update all packages in package.json file.
With this, you are ready to move on.
Inside your project directory, create a new file called android-web-test.js.
Give it the following contents, then save it:
import 'babel-polyfill'
import 'colors'
import wd from 'wd'
import {assert} from 'chai'

const username = ''
const apiKey = ''

const kobitonServerConfig = {
  protocol: 'https',
  host: 'api.kobiton.com',
  auth: `${username}:${apiKey}`
}

const desiredCaps = {
  sessionName:        'Automation test session',
  sessionDescription: 'This is an example for Android web',
  deviceOrientation:  'portrait',
  captureScreenshots: true,
  browserName:        'chrome',
  deviceGroup:        'KOBITON',
  deviceName:         'Galaxy',
  platformName:       'Android'
}

let driver

describe('Android Web sample', () => {

  before(async () => {
    driver = wd.promiseChainRemote(kobitonServerConfig)

    driver.on('status', (info) => {
      console.log(info.cyan)
    })
    driver.on('command', (meth, path, data) => {
      console.log(' > ' + meth.yellow, path.grey, data || '')
    })
    driver.on('http', (meth, path, data) => {
      console.log(' > ' + meth.magenta, path, (data || '').grey)
    })

    try {
      await driver.init(desiredCaps)
    }
    catch (err) {
      if (err.data) {
        console.error(`init driver: ${err.data}`)
      }
    throw err
    }
  })

  it('should return the title that contains Kobiton', async () => {
    await driver.get('https://www.google.com')
    .waitForElementByName('q')
    .sendKeys('Kobiton')
    .sleep(3000)
    .waitForElementByName('btnG')
    .click()

    let msg = await driver.title()
    assert.include(msg, 'Kobiton - Google Search')
  })

  after(async () => {
    if (driver != null) {
    try {
      await driver.quit()
    }
    catch (err) {
      console.error(`quit driver: ${err}`)
    }
  }
  })
})
Inside your project directory, create a new file called .babelrc. Give it the following contents, then save it:
{
  "presets": ["es2015"],
  "plugins": [
    "add-module-exports",
    "syntax-async-functions",
    "syntax-flow",
    "transform-regenerator",
    "transform-function-bind",
    "transform-object-rest-spread",
    "transform-decorators-legacy",
    "transform-class-properties",
    "transform-export-extensions",
    "transform-flow-strip-types",
    "transform-do-expressions"
  ]
}-
Let’s get started with a Kobiton Trial.
-
Create a Kobiton trial account.
-
Sign in. This should happen automatically after you verify your email address.
-
When you first sign in, you should be on Devices page.
-
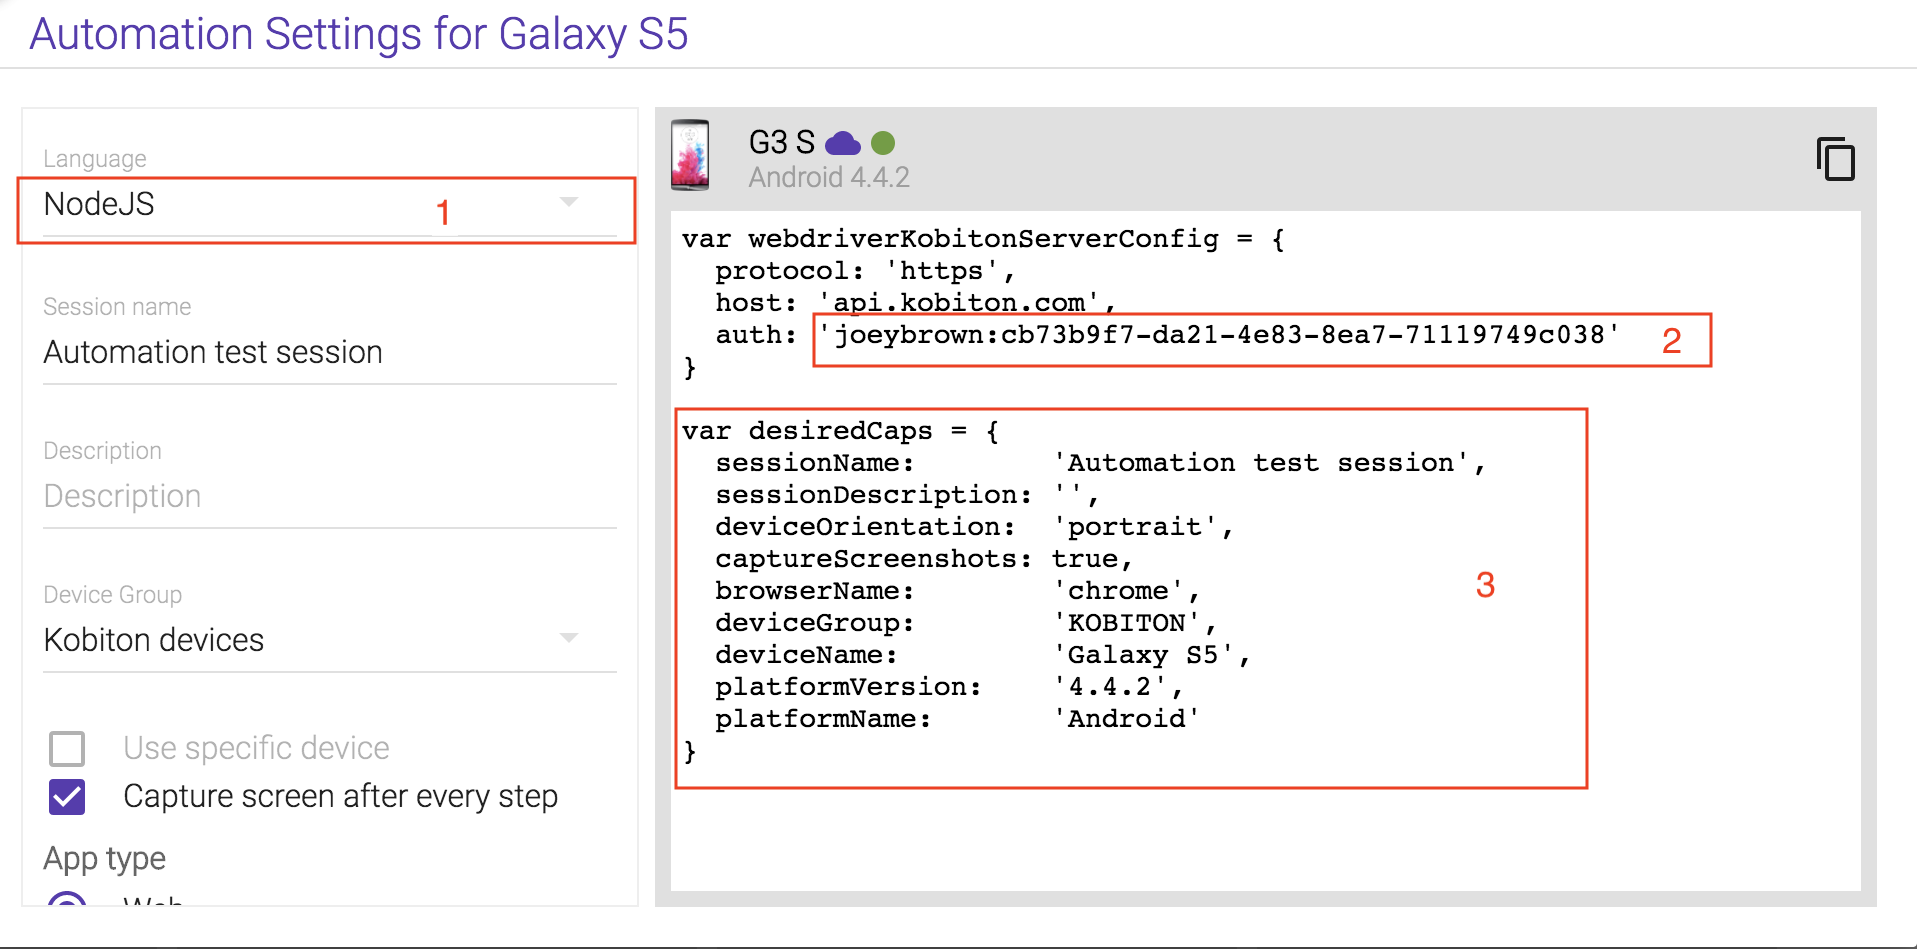
Hover over the device you want to test and select Show automation settings.
-
Select Language = NodeJS.
-
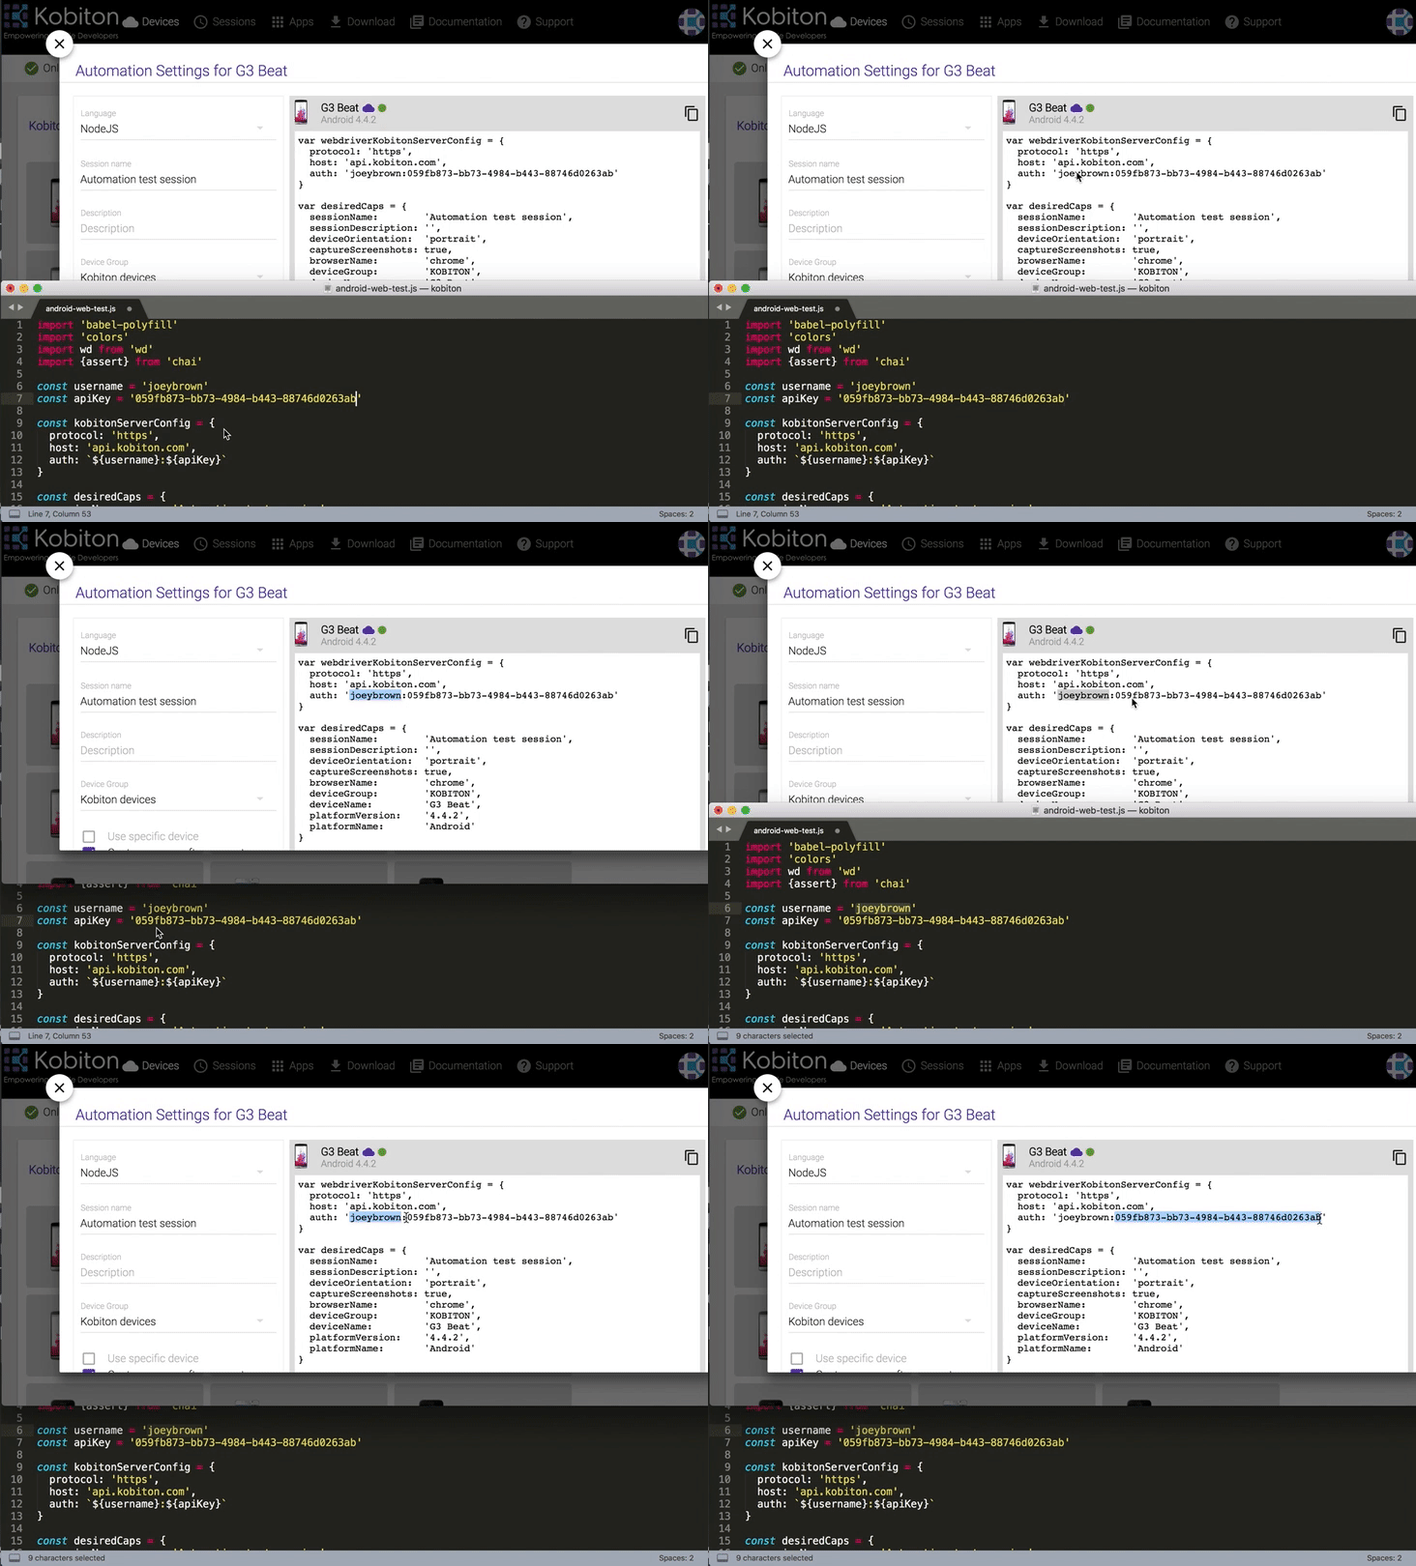
Replace
username&apiKeyin the sample script
const username = ''
const apiKey = ''- Replace the
desiredCapsto indicate your exptected testing device.
const desiredCaps = {
  sessionName:        'Automation test session',
  sessionDescription: 'This is an example for Android web',
  deviceOrientation:  'portrait',
  captureScreenshots: true,
  browserName:        'chrome',
  deviceGroup:        'KOBITON',
  deviceName:         'Galaxy',
  platformName:       'Android'
}Once you have everything set up, you can run the example test simply by running the following command:
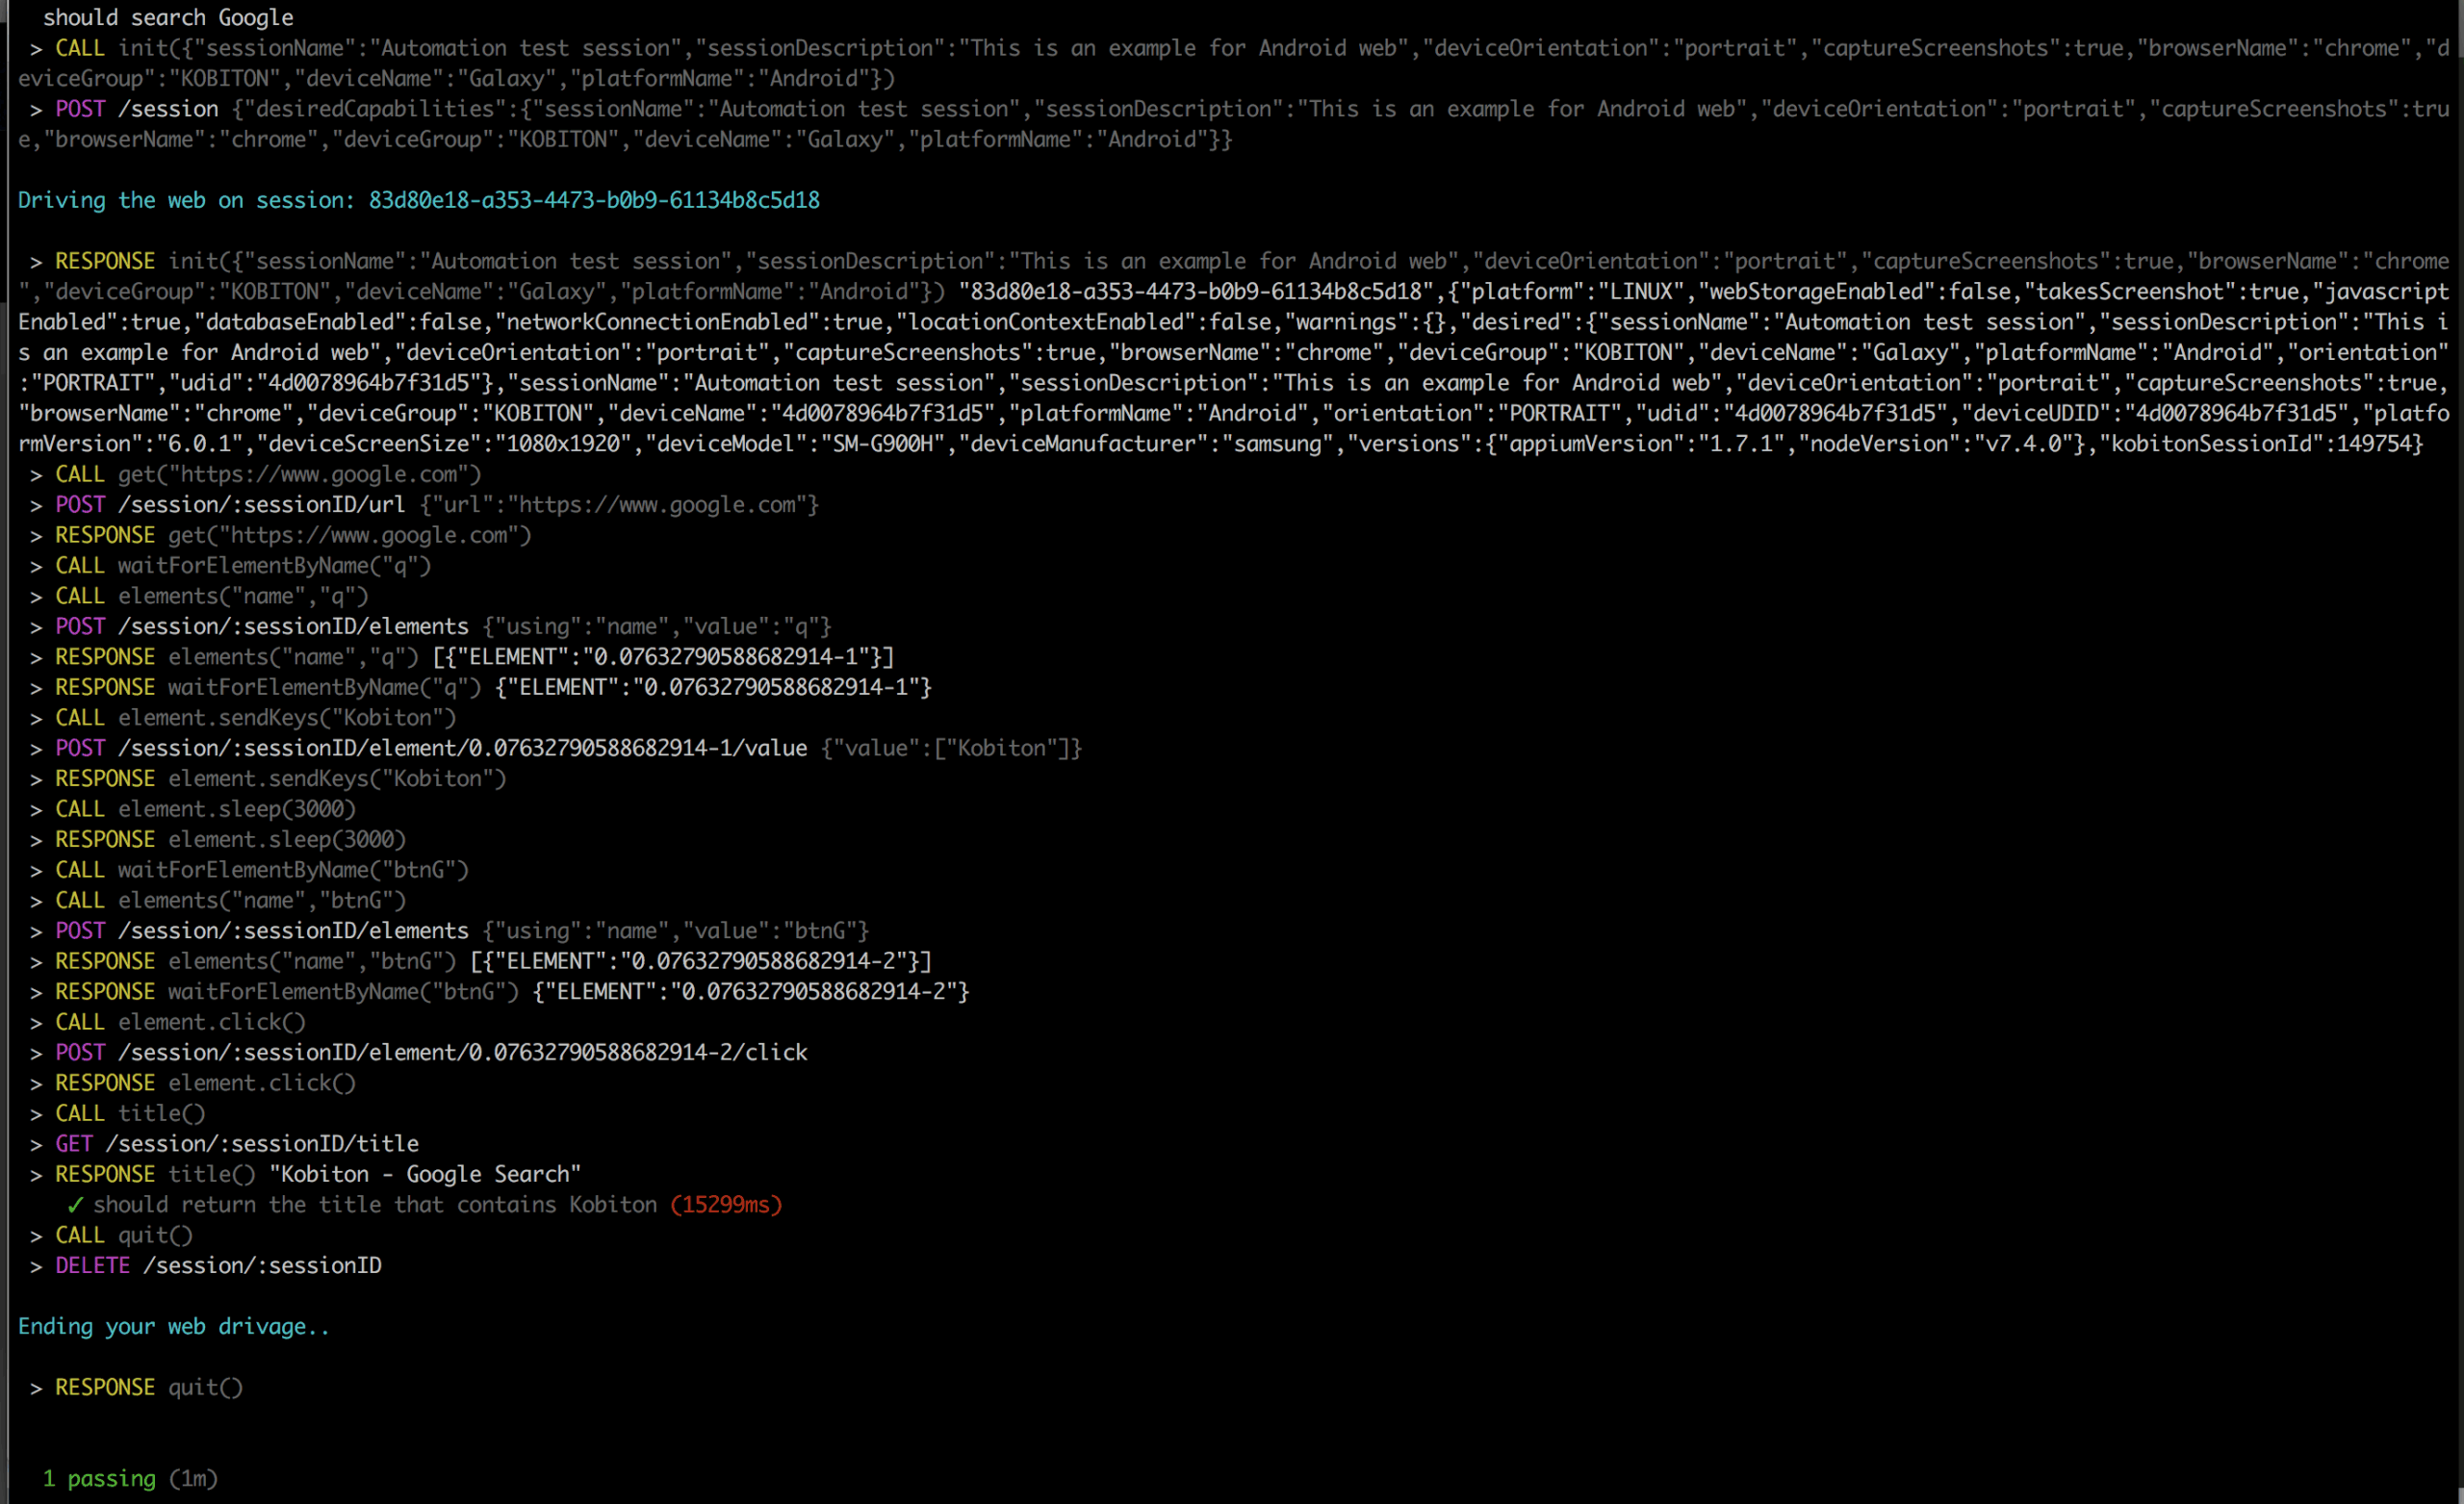
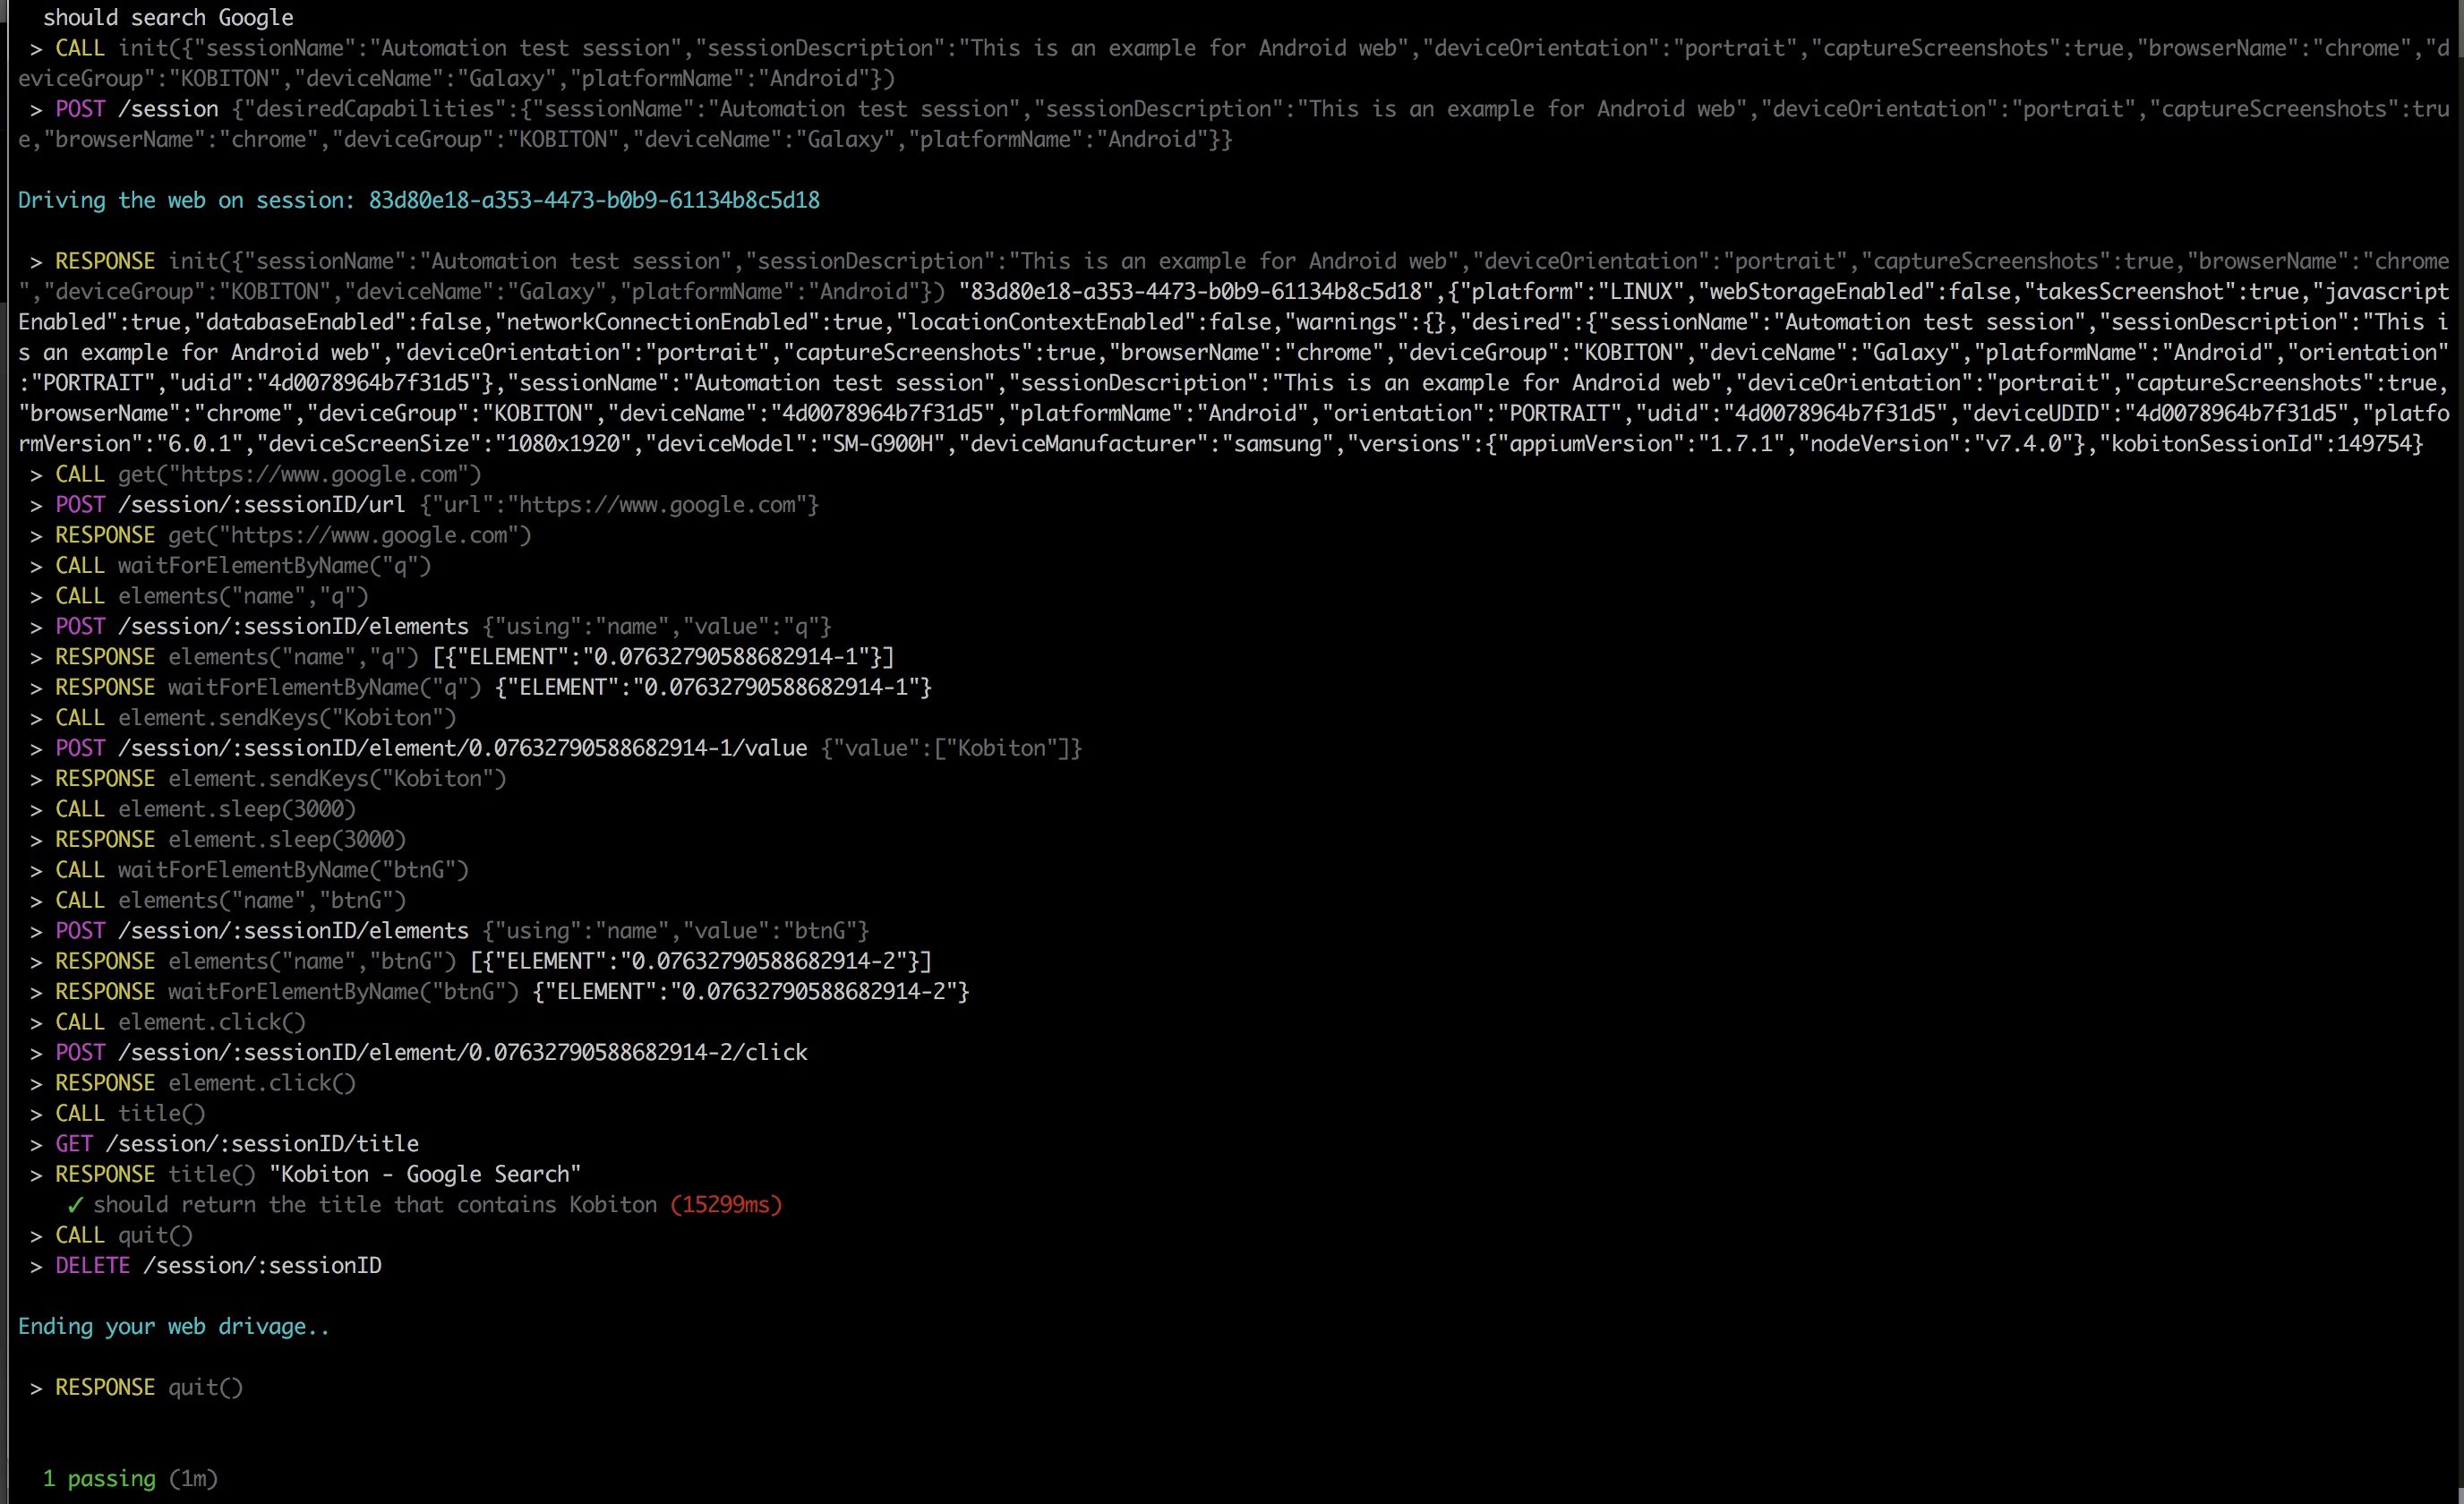
npm run android-web-test-
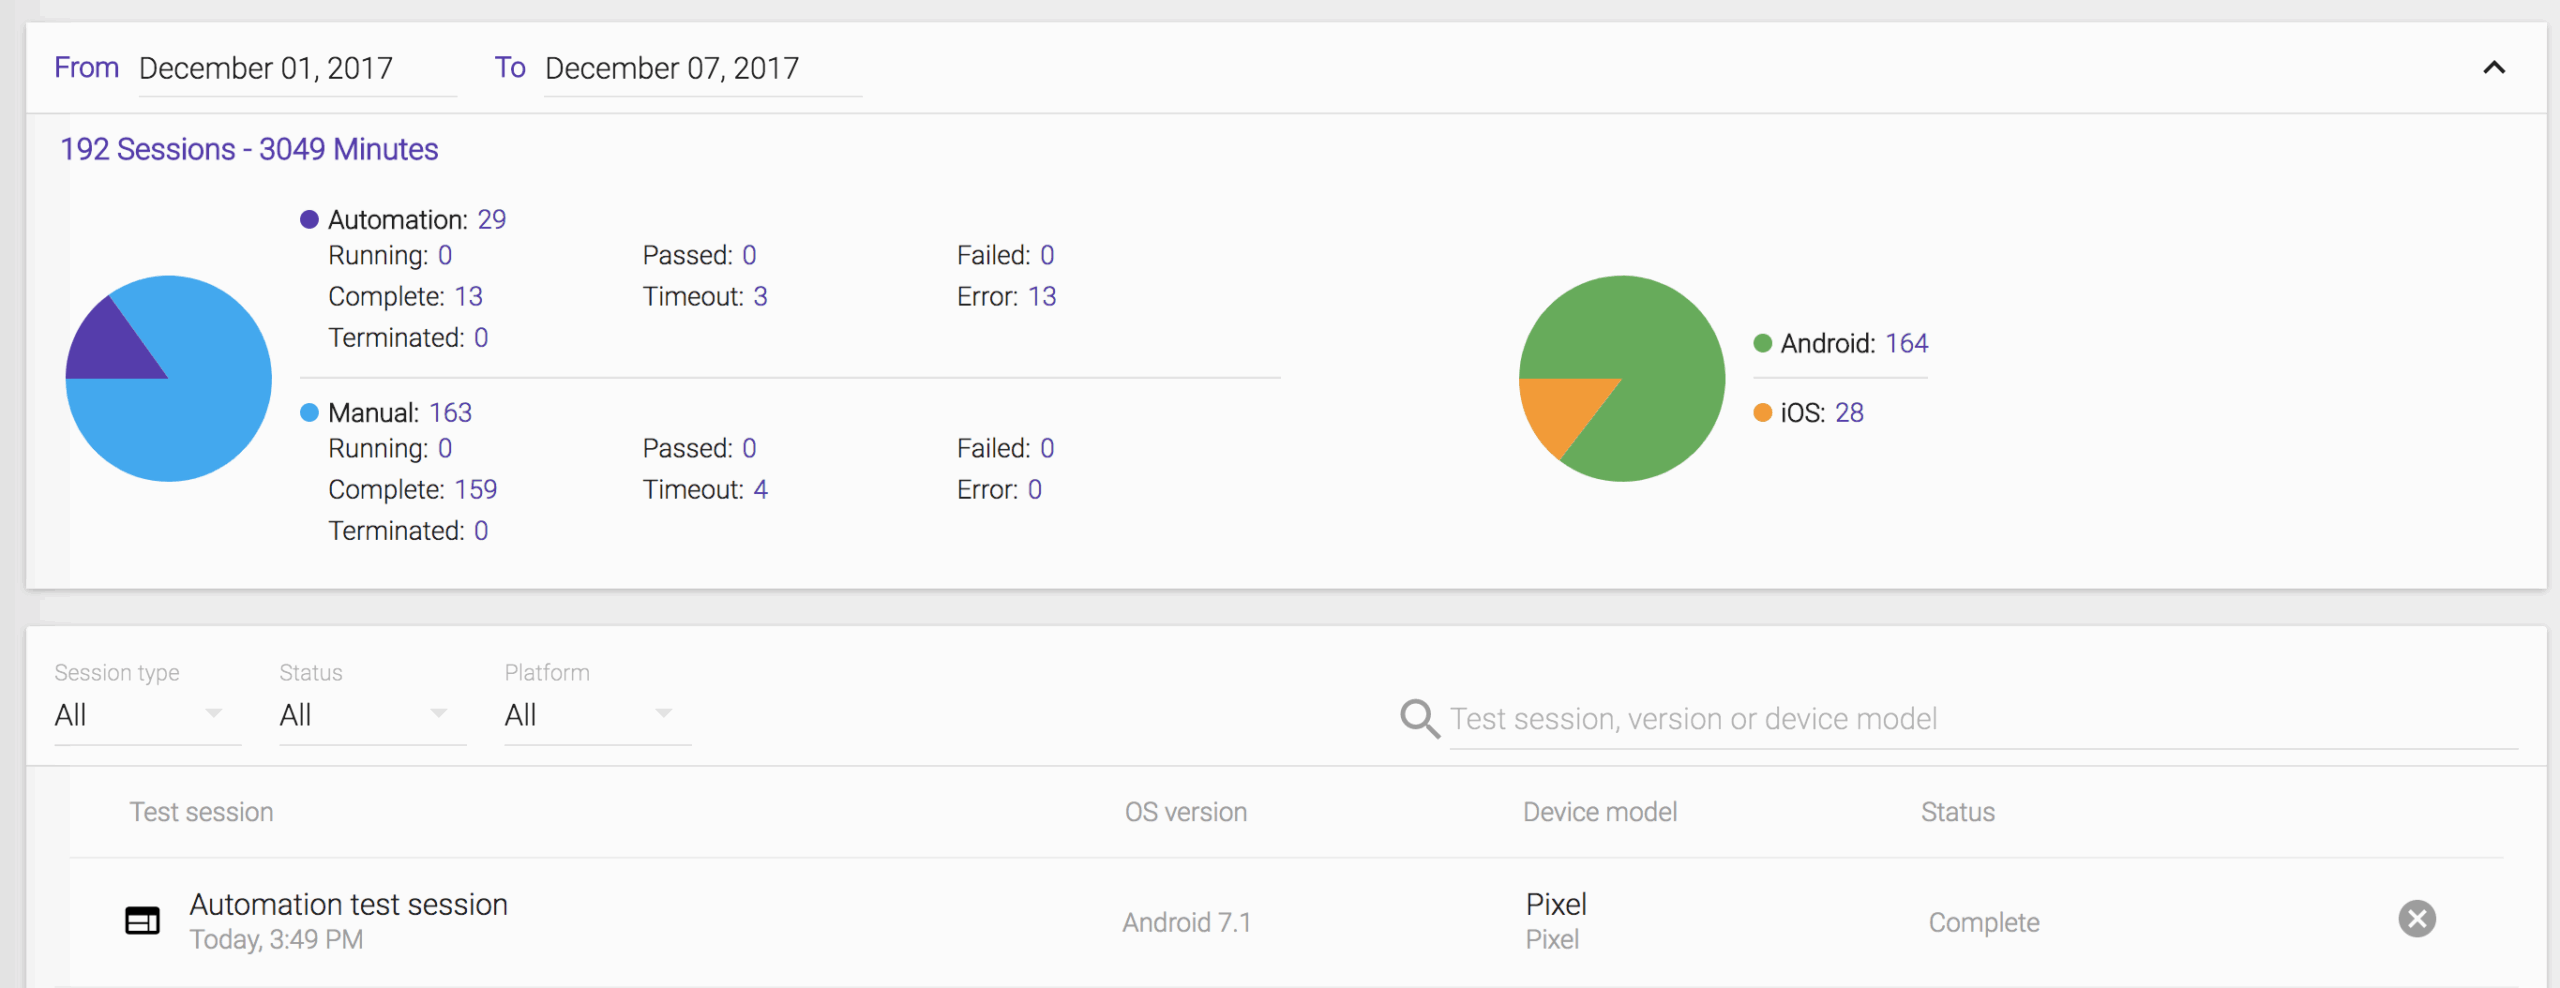
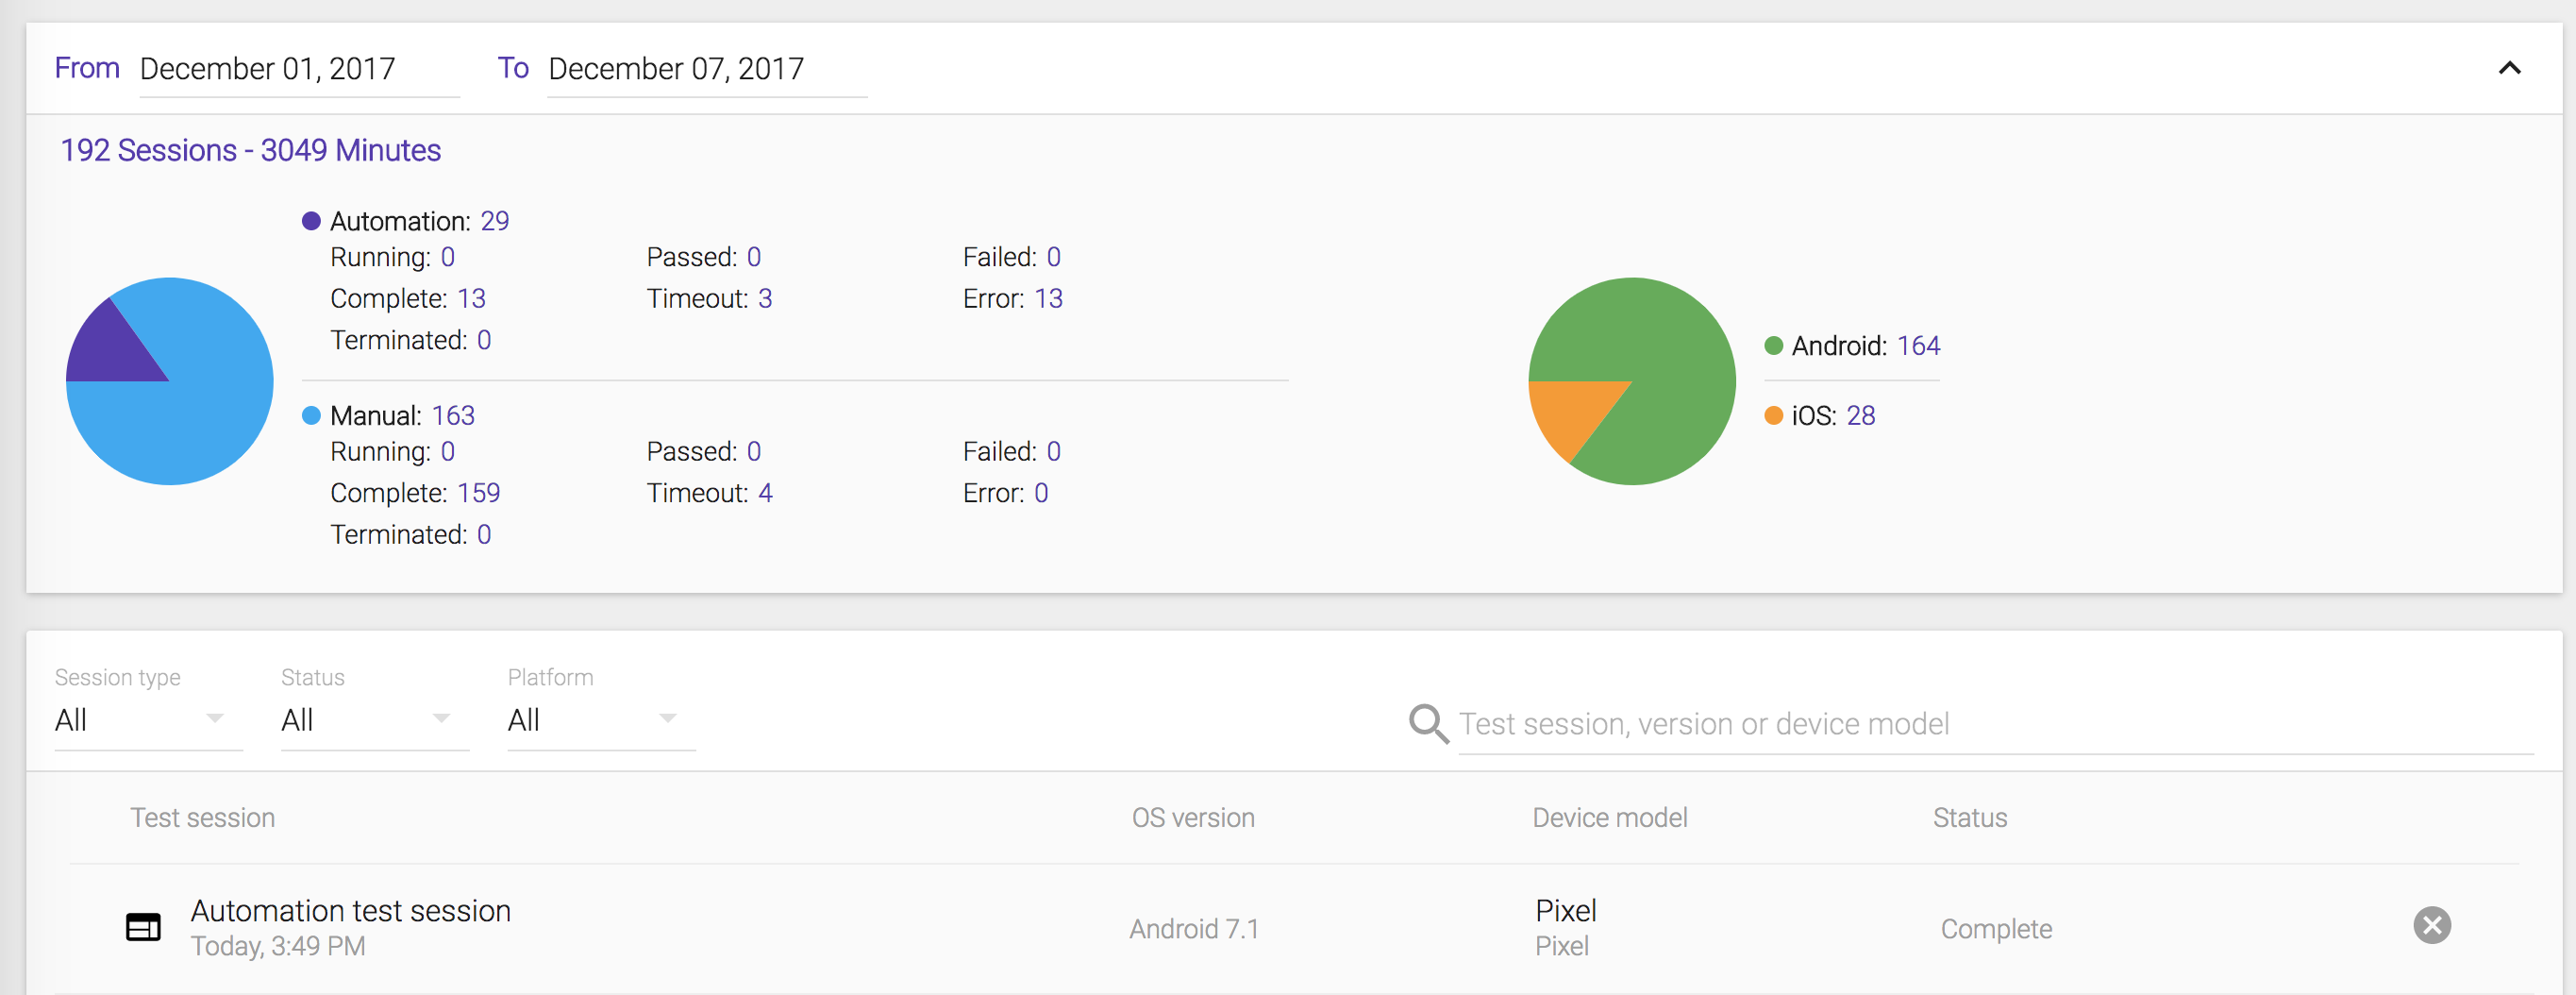
When you see your test ‘Complete’ on Terminal, you can access https://portal.kobiton.com/sessions to get your test results.
-
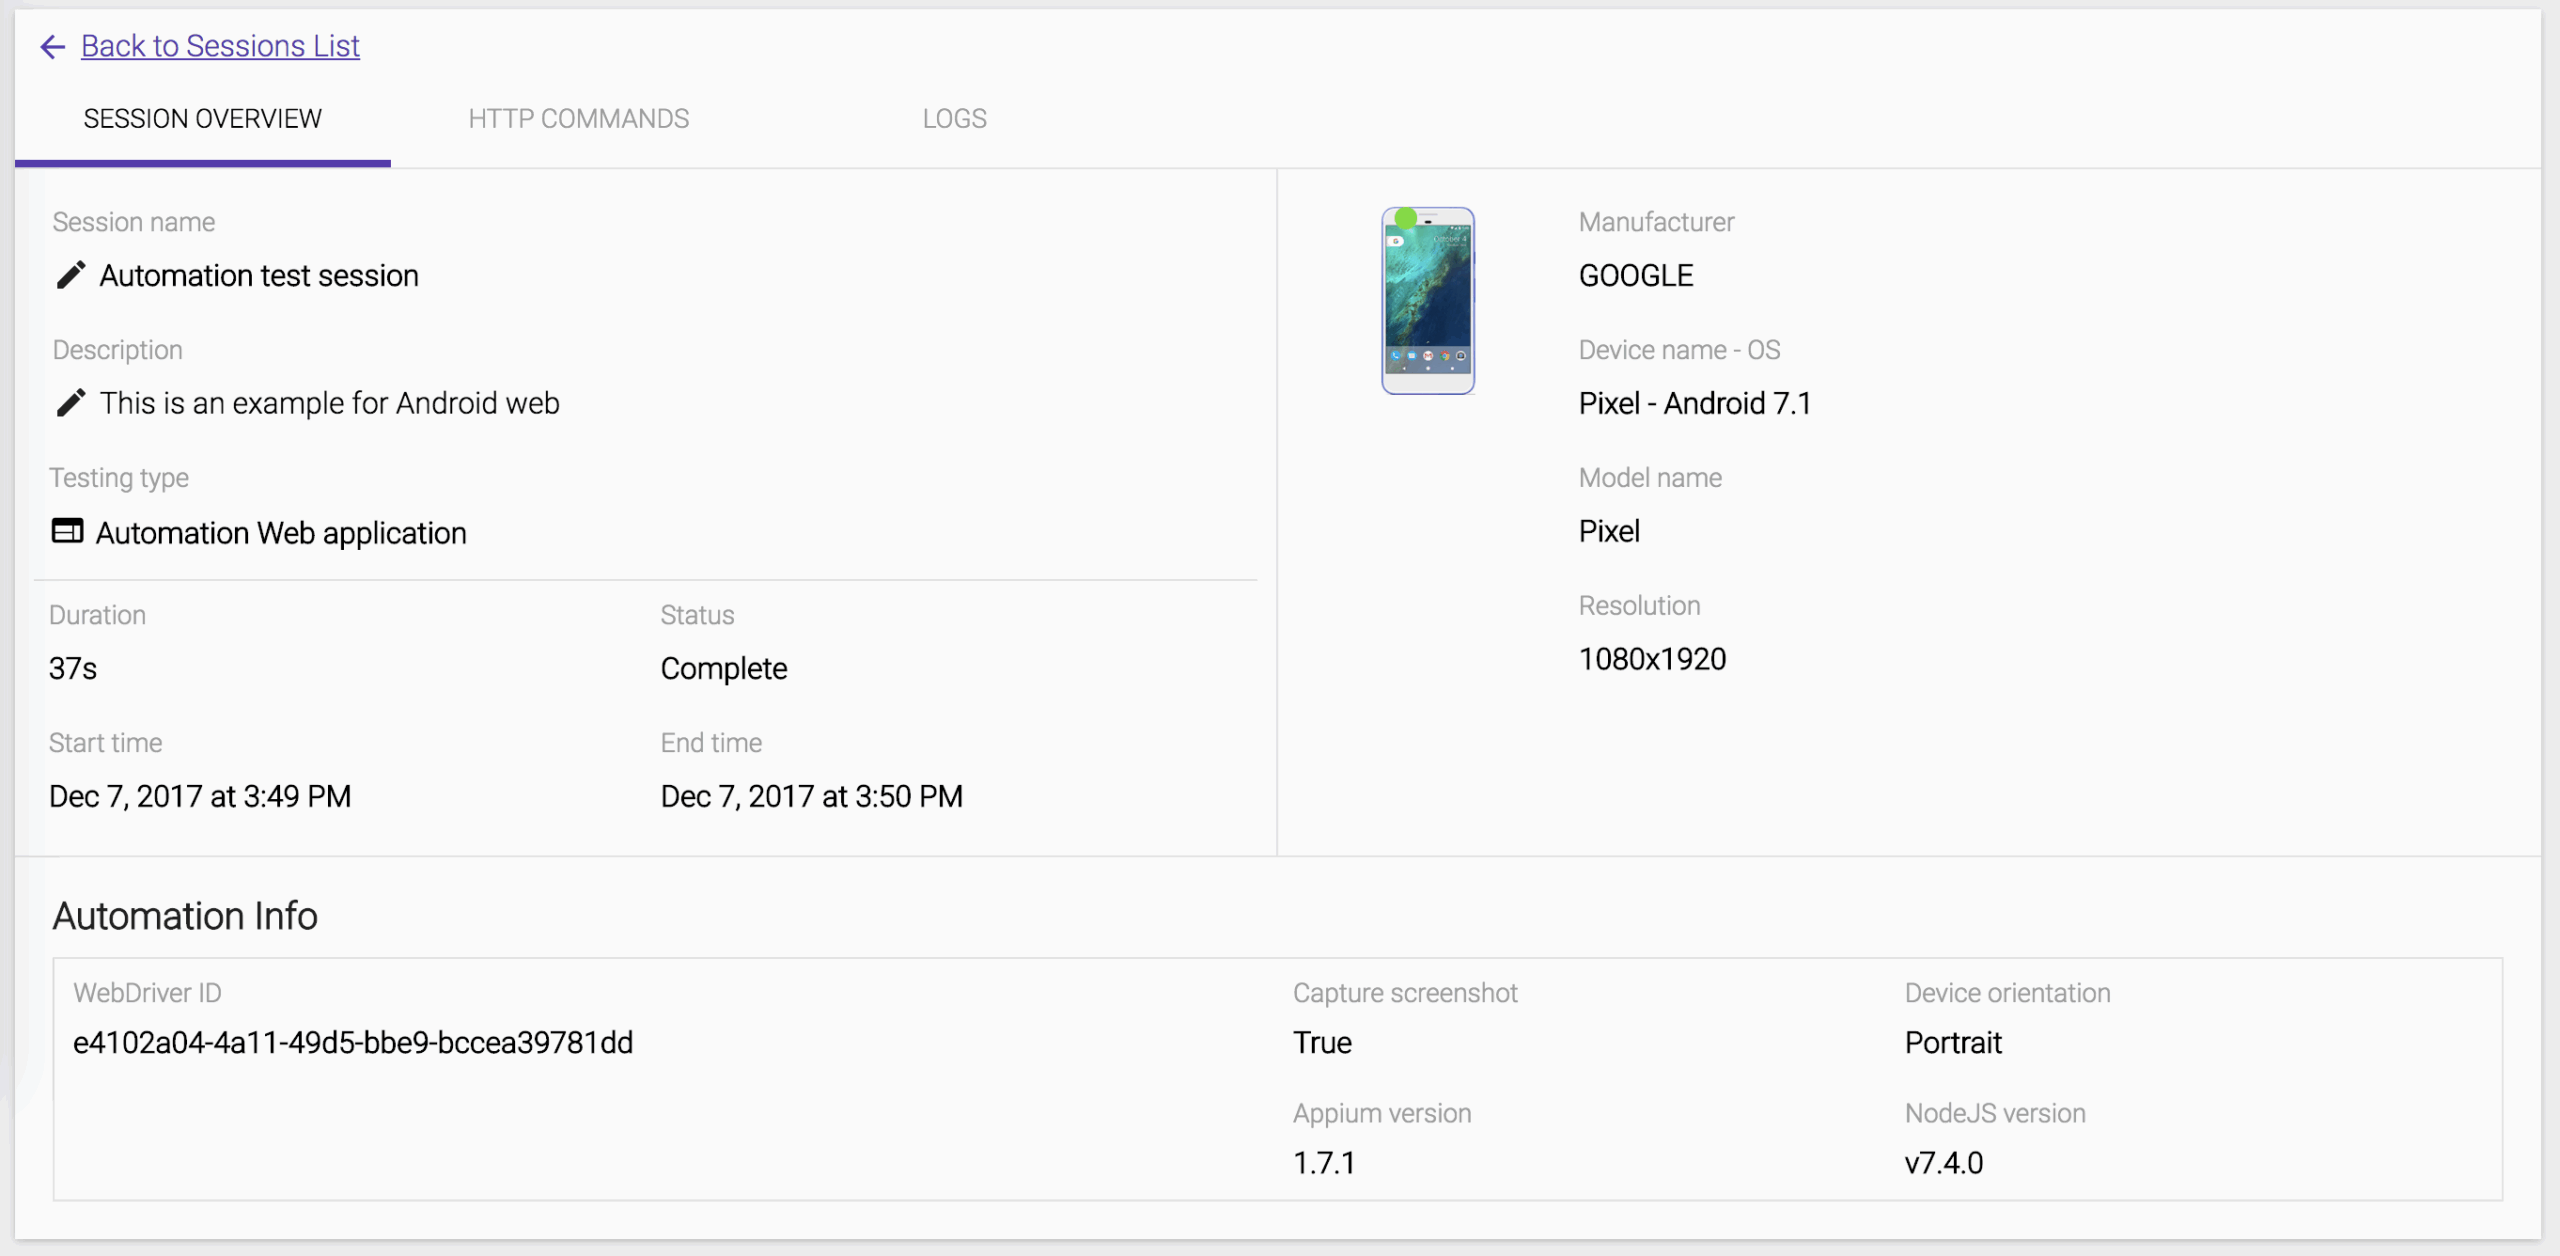
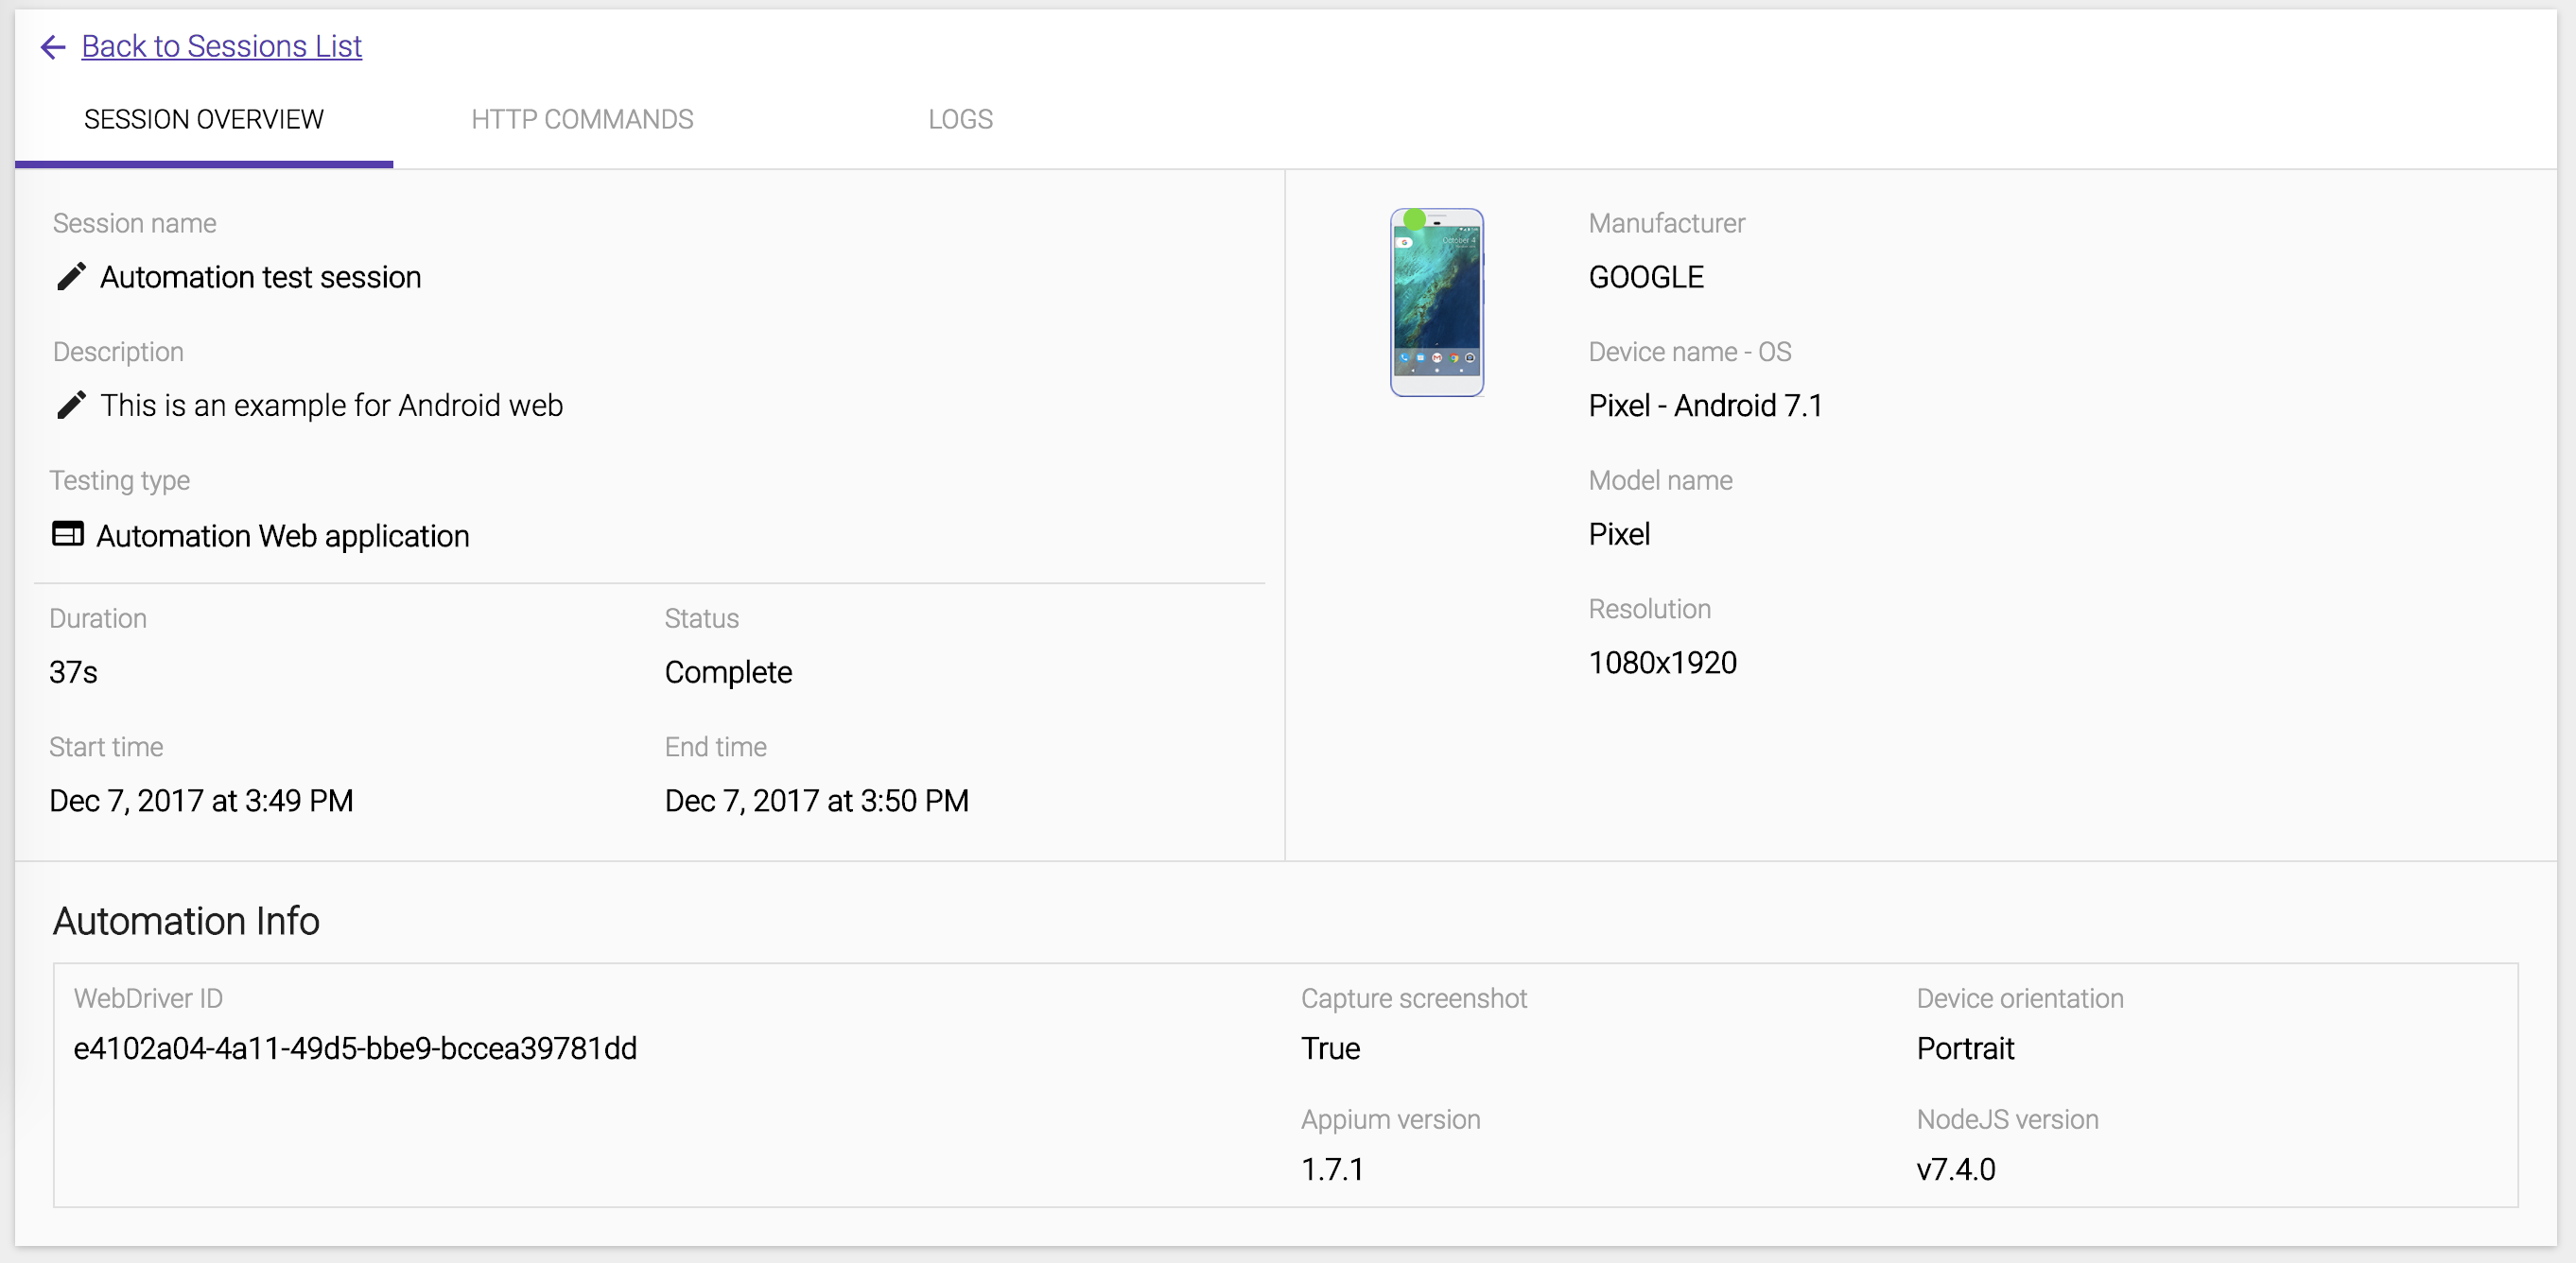
We can see the session overview for the latest test session.
-
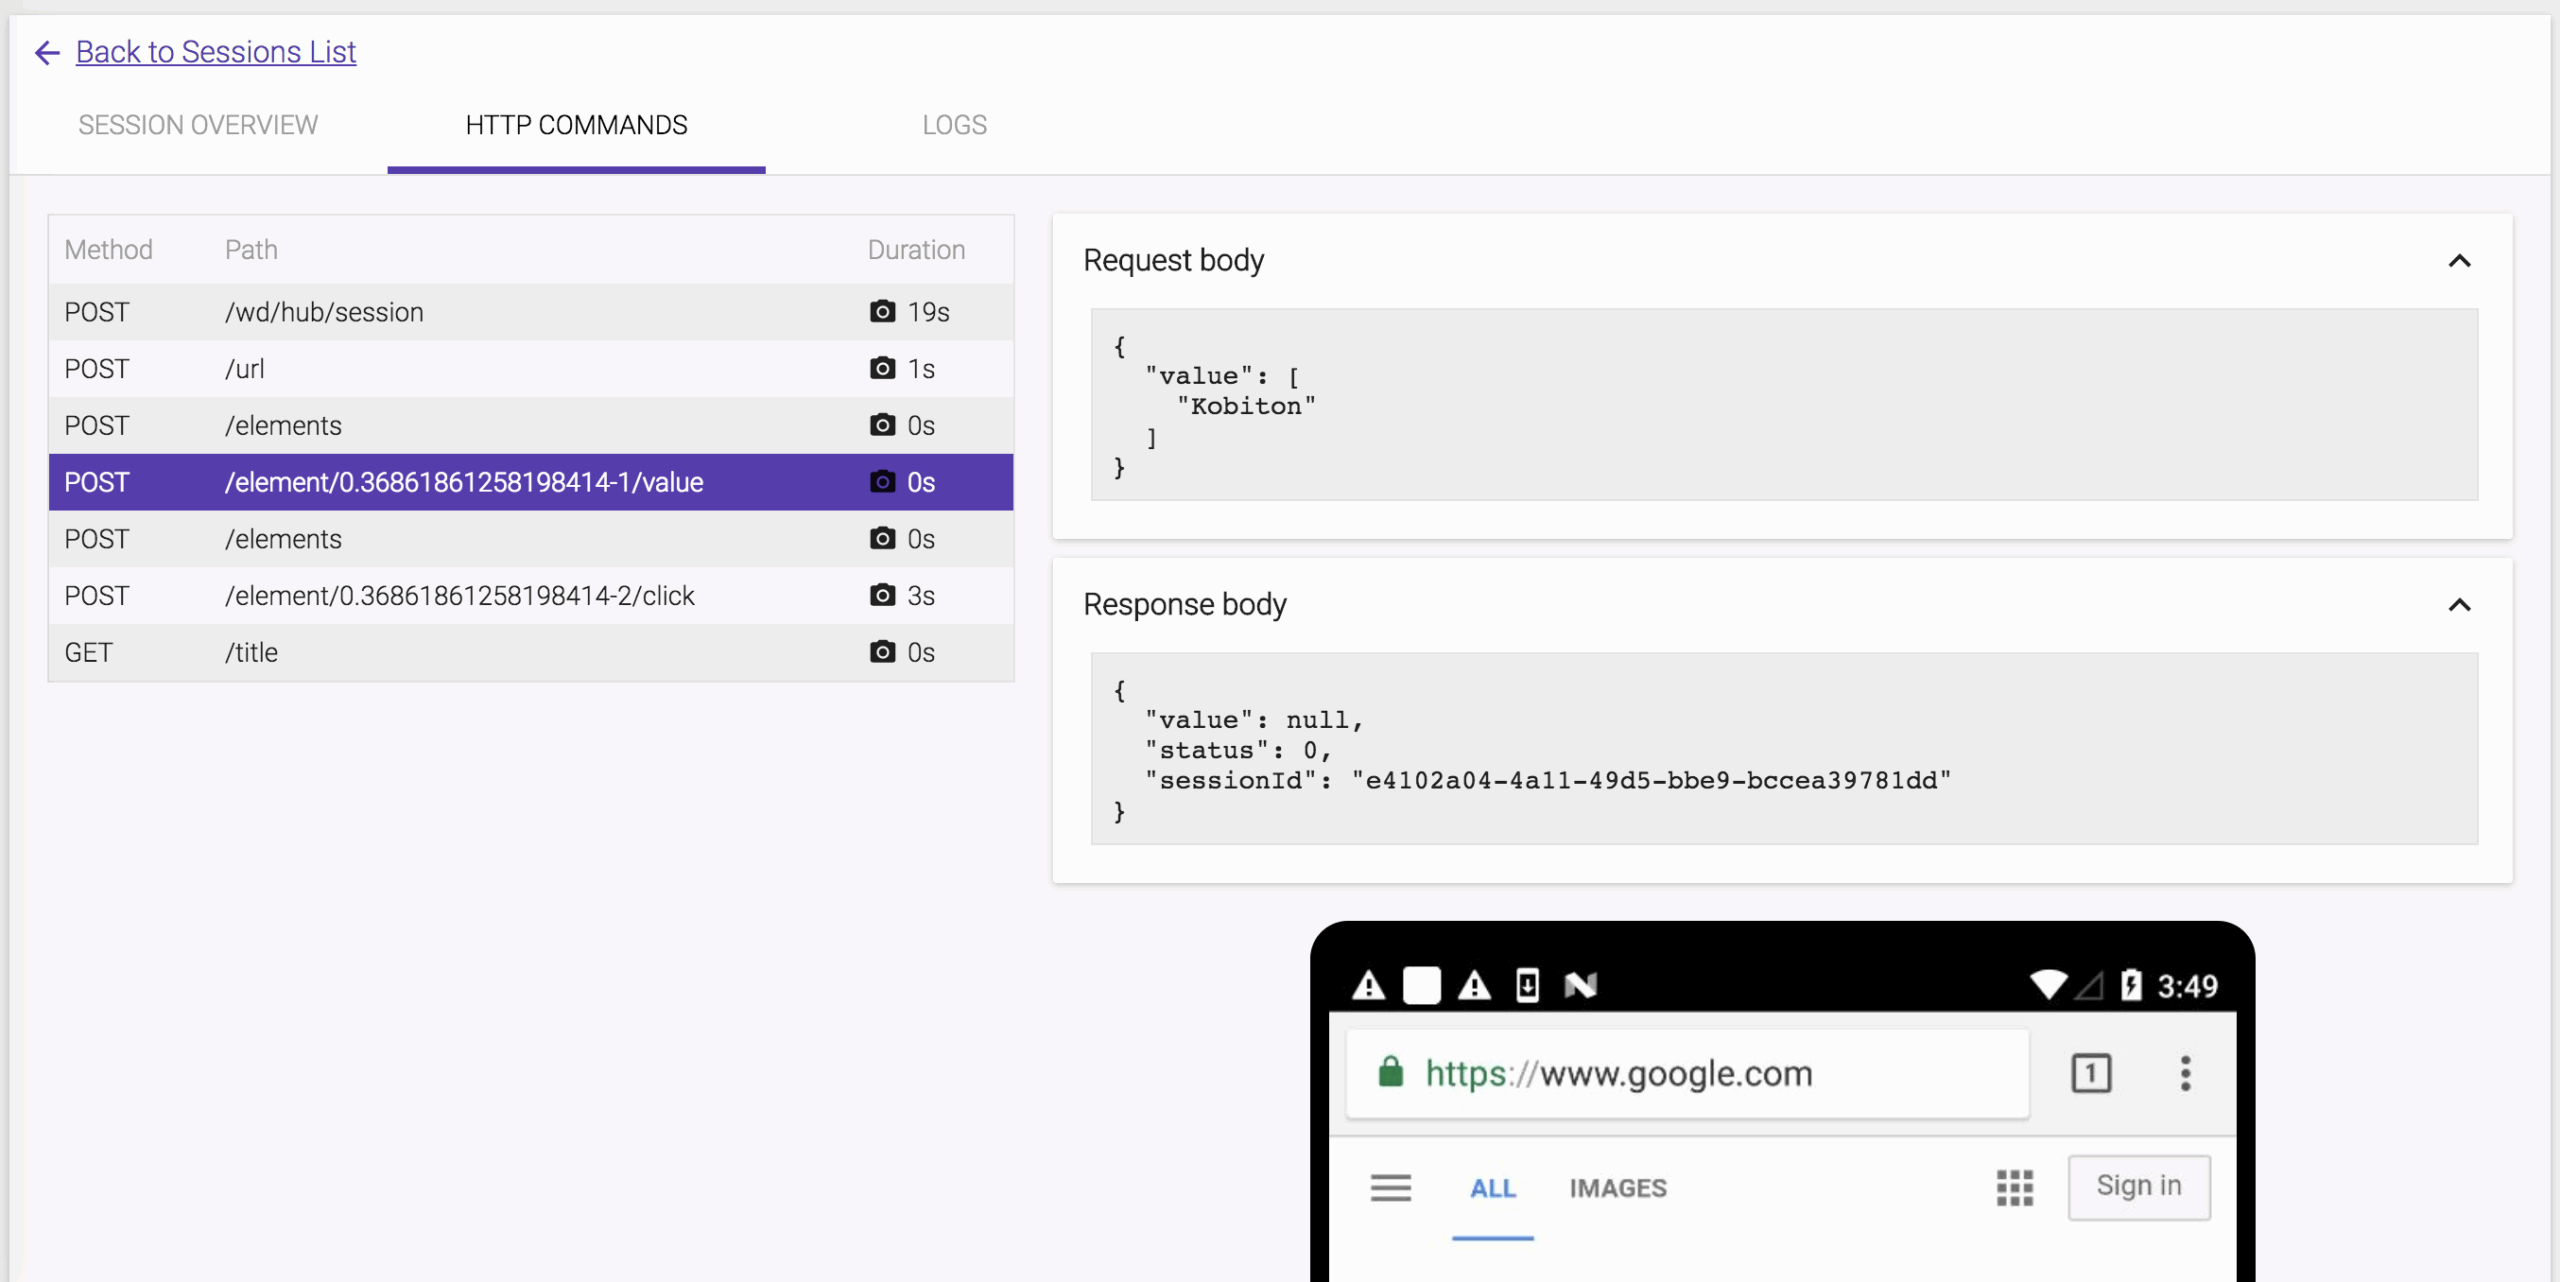
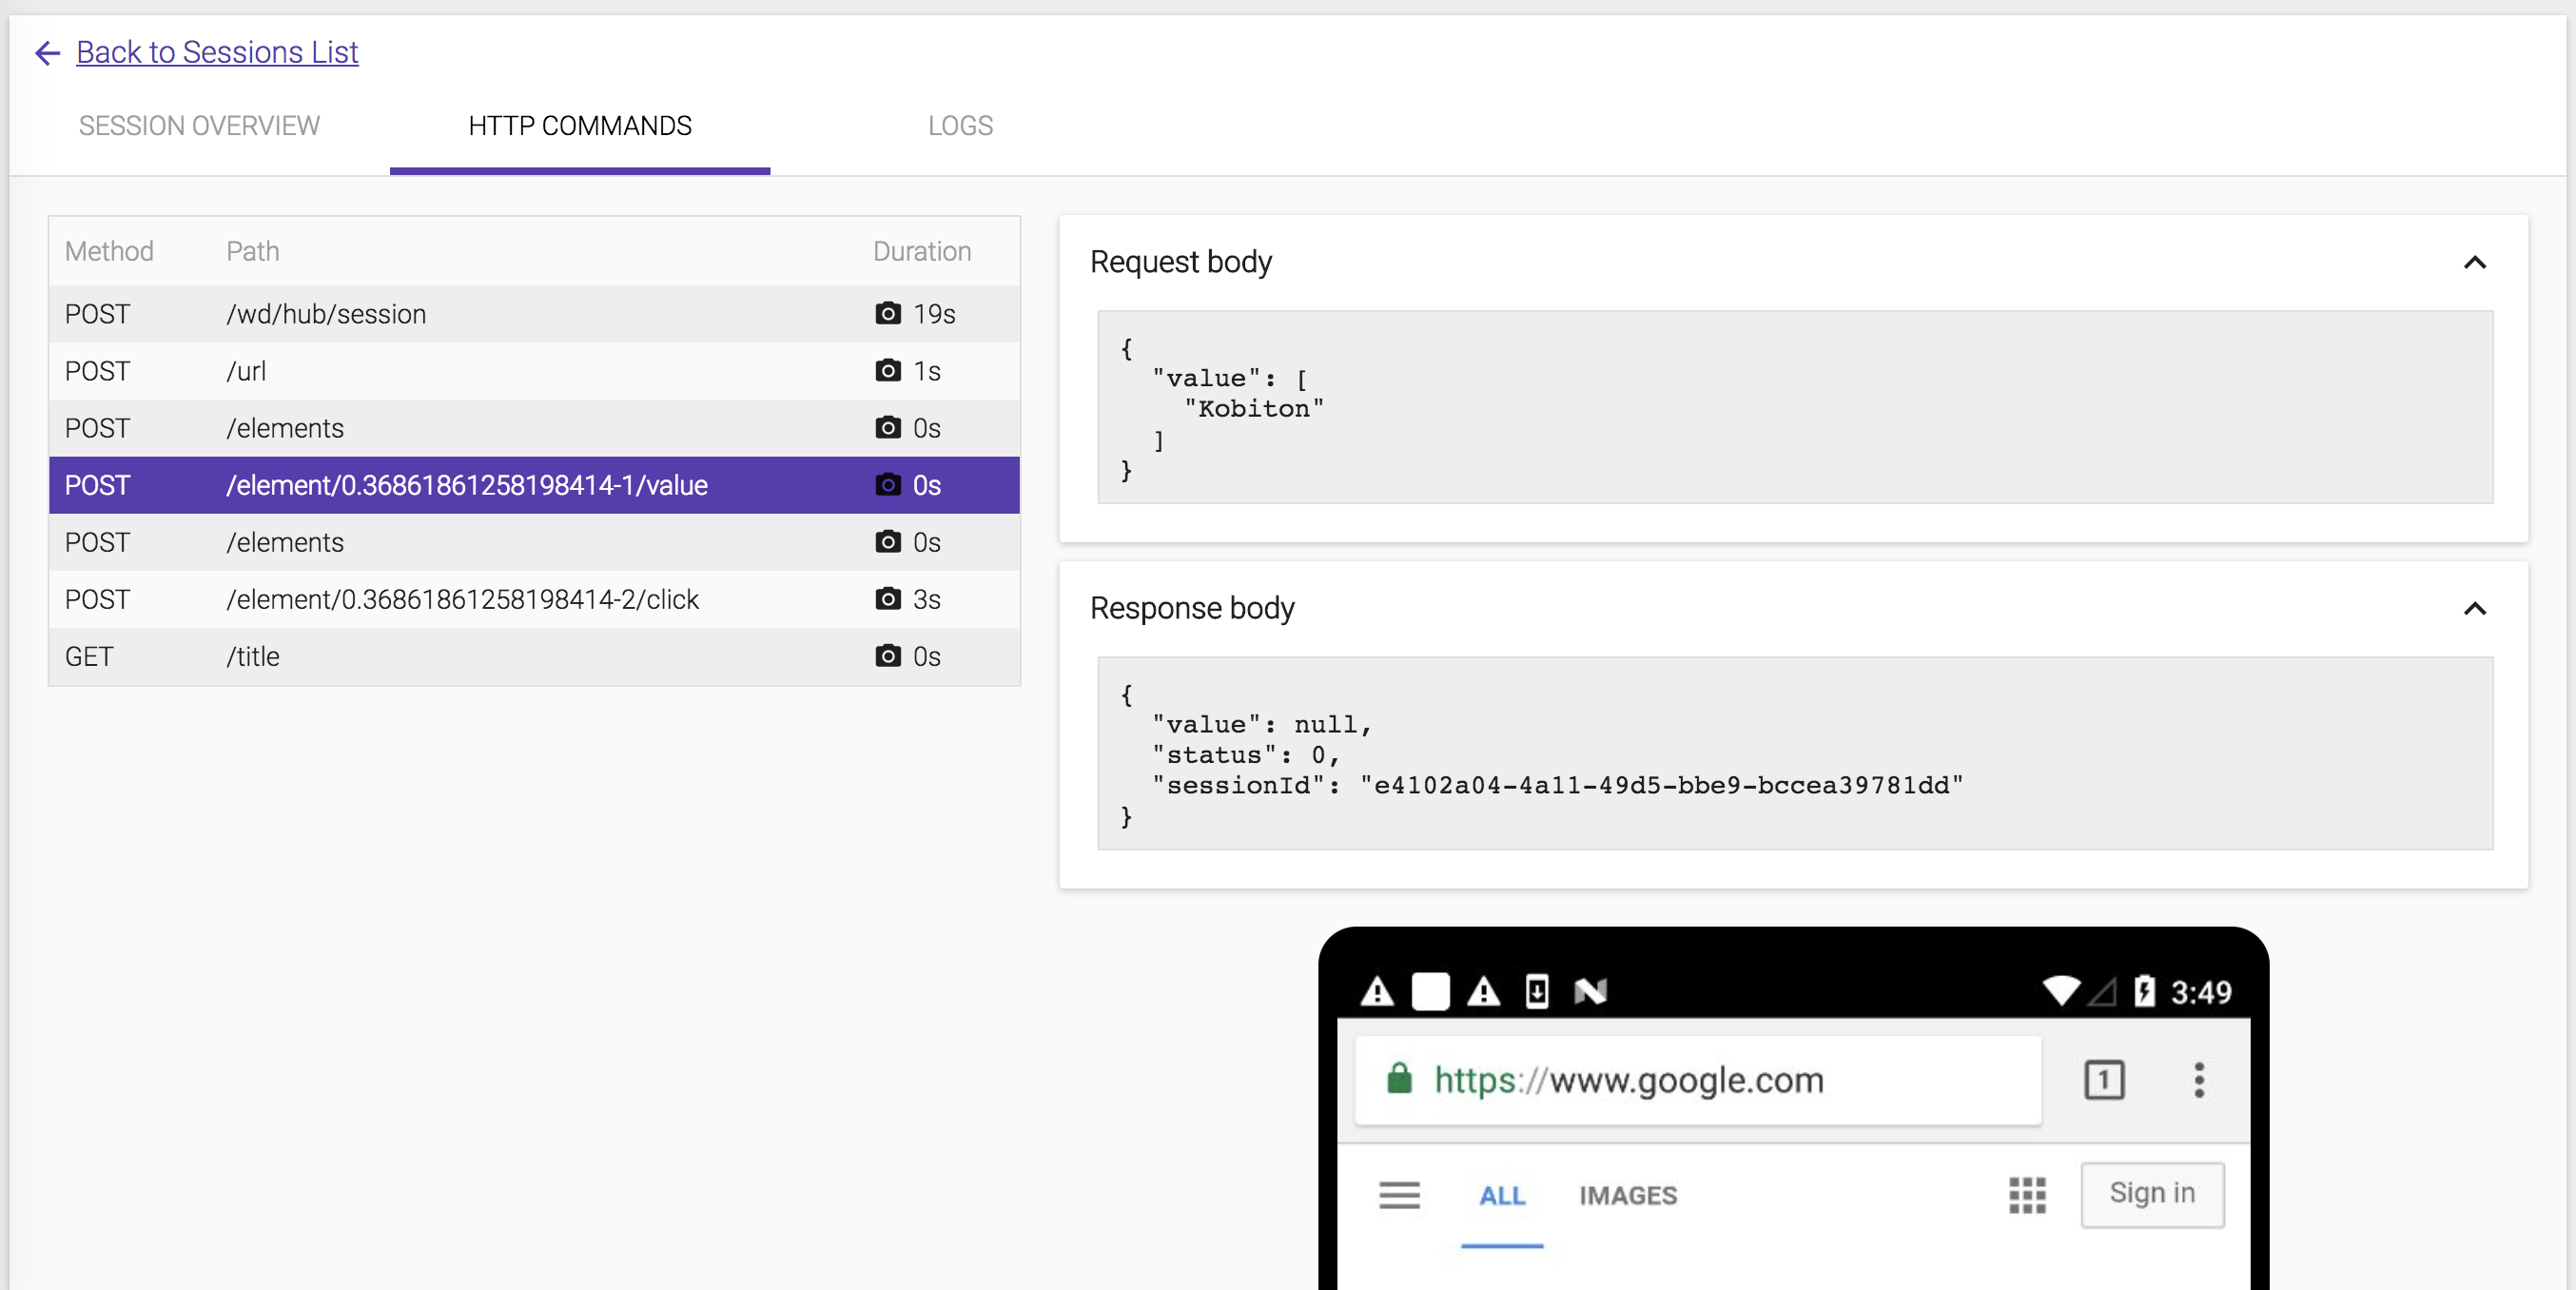
The HTTP Commands details are also included the test result.
-
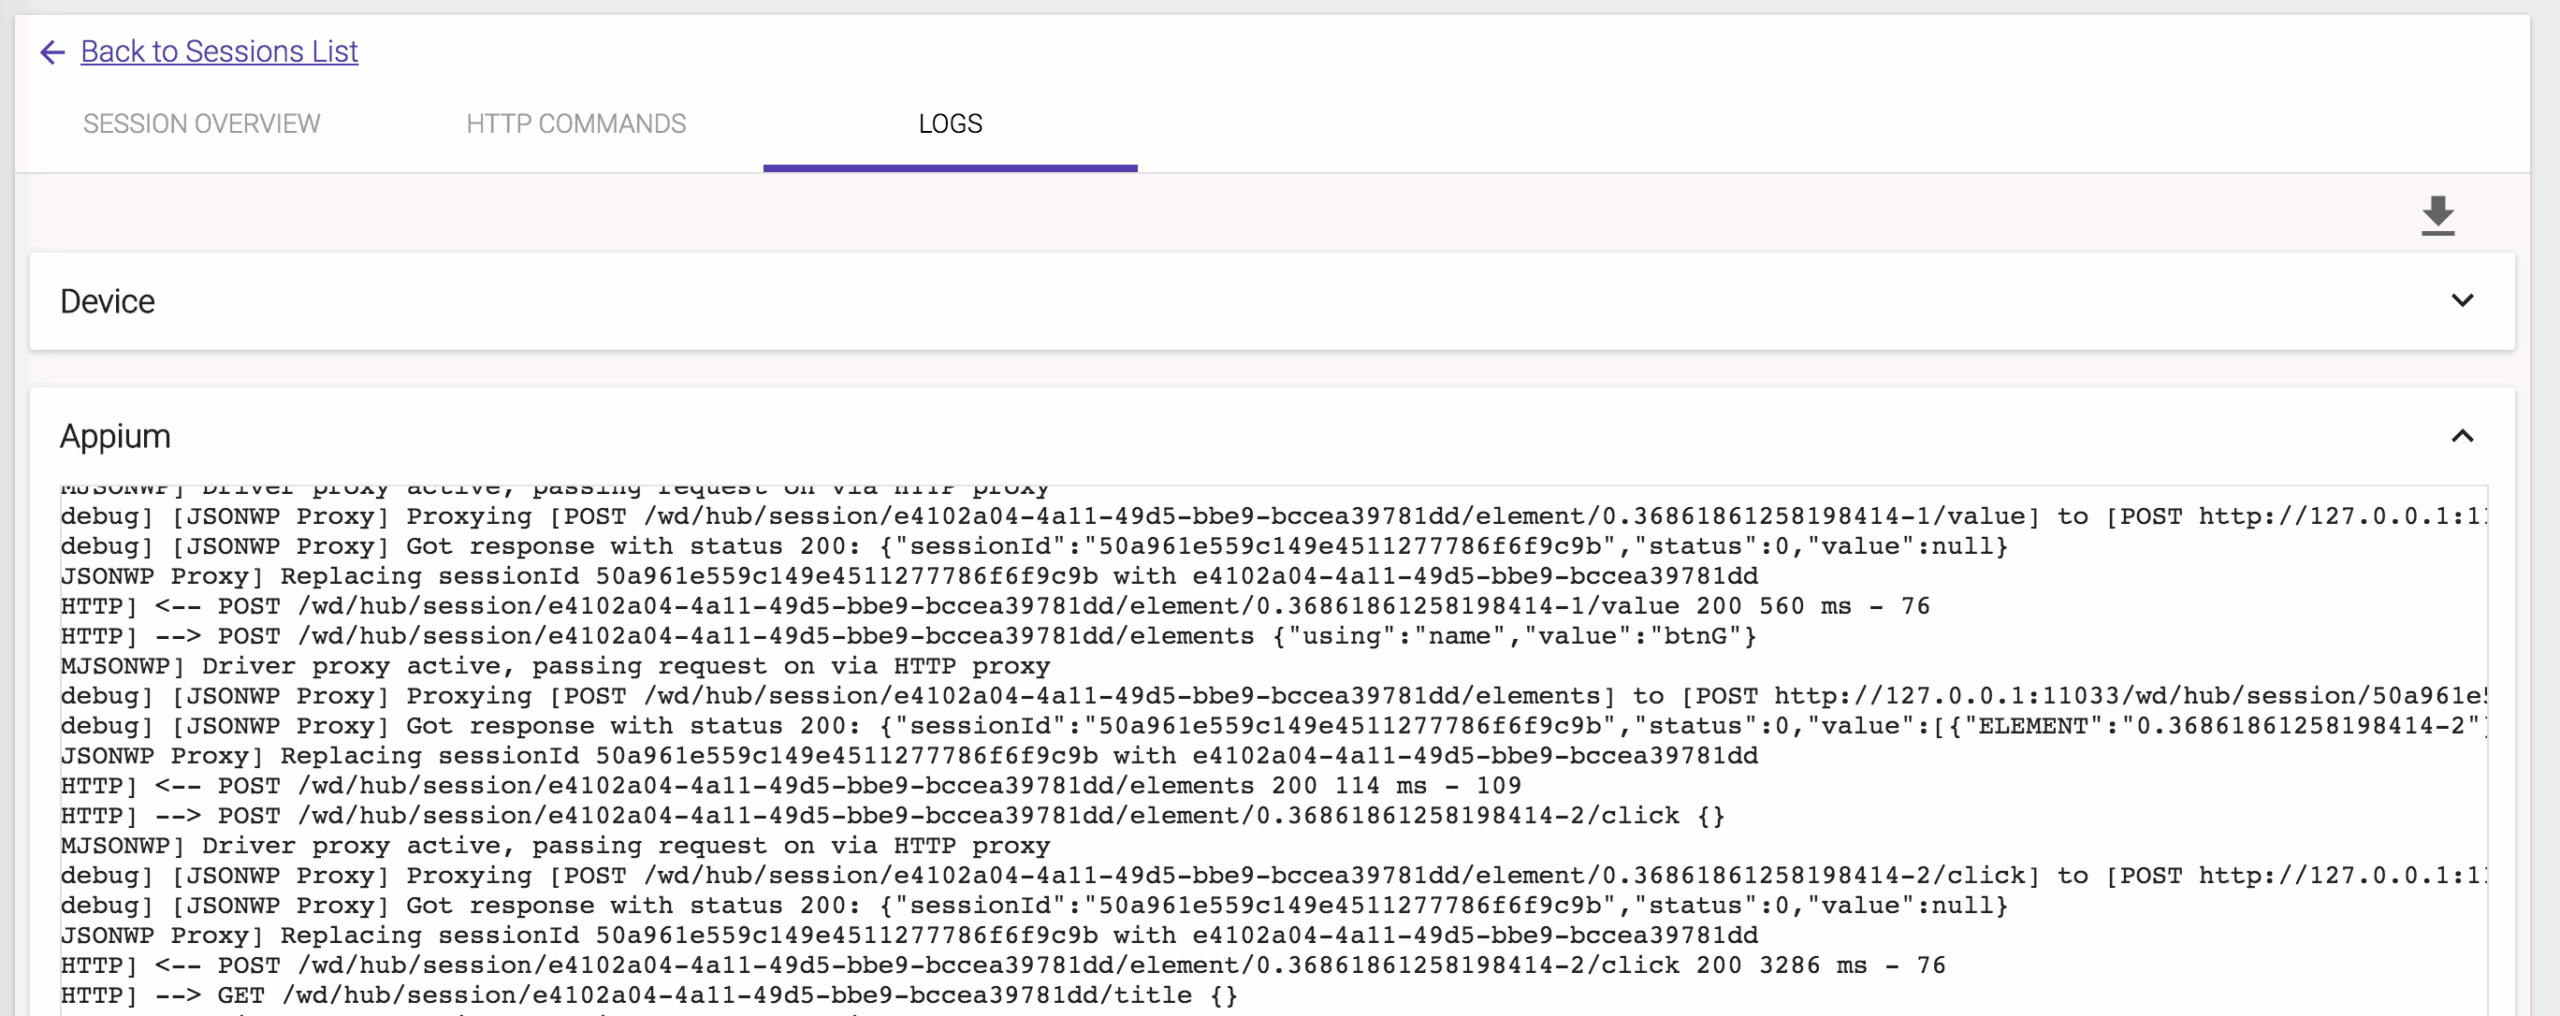
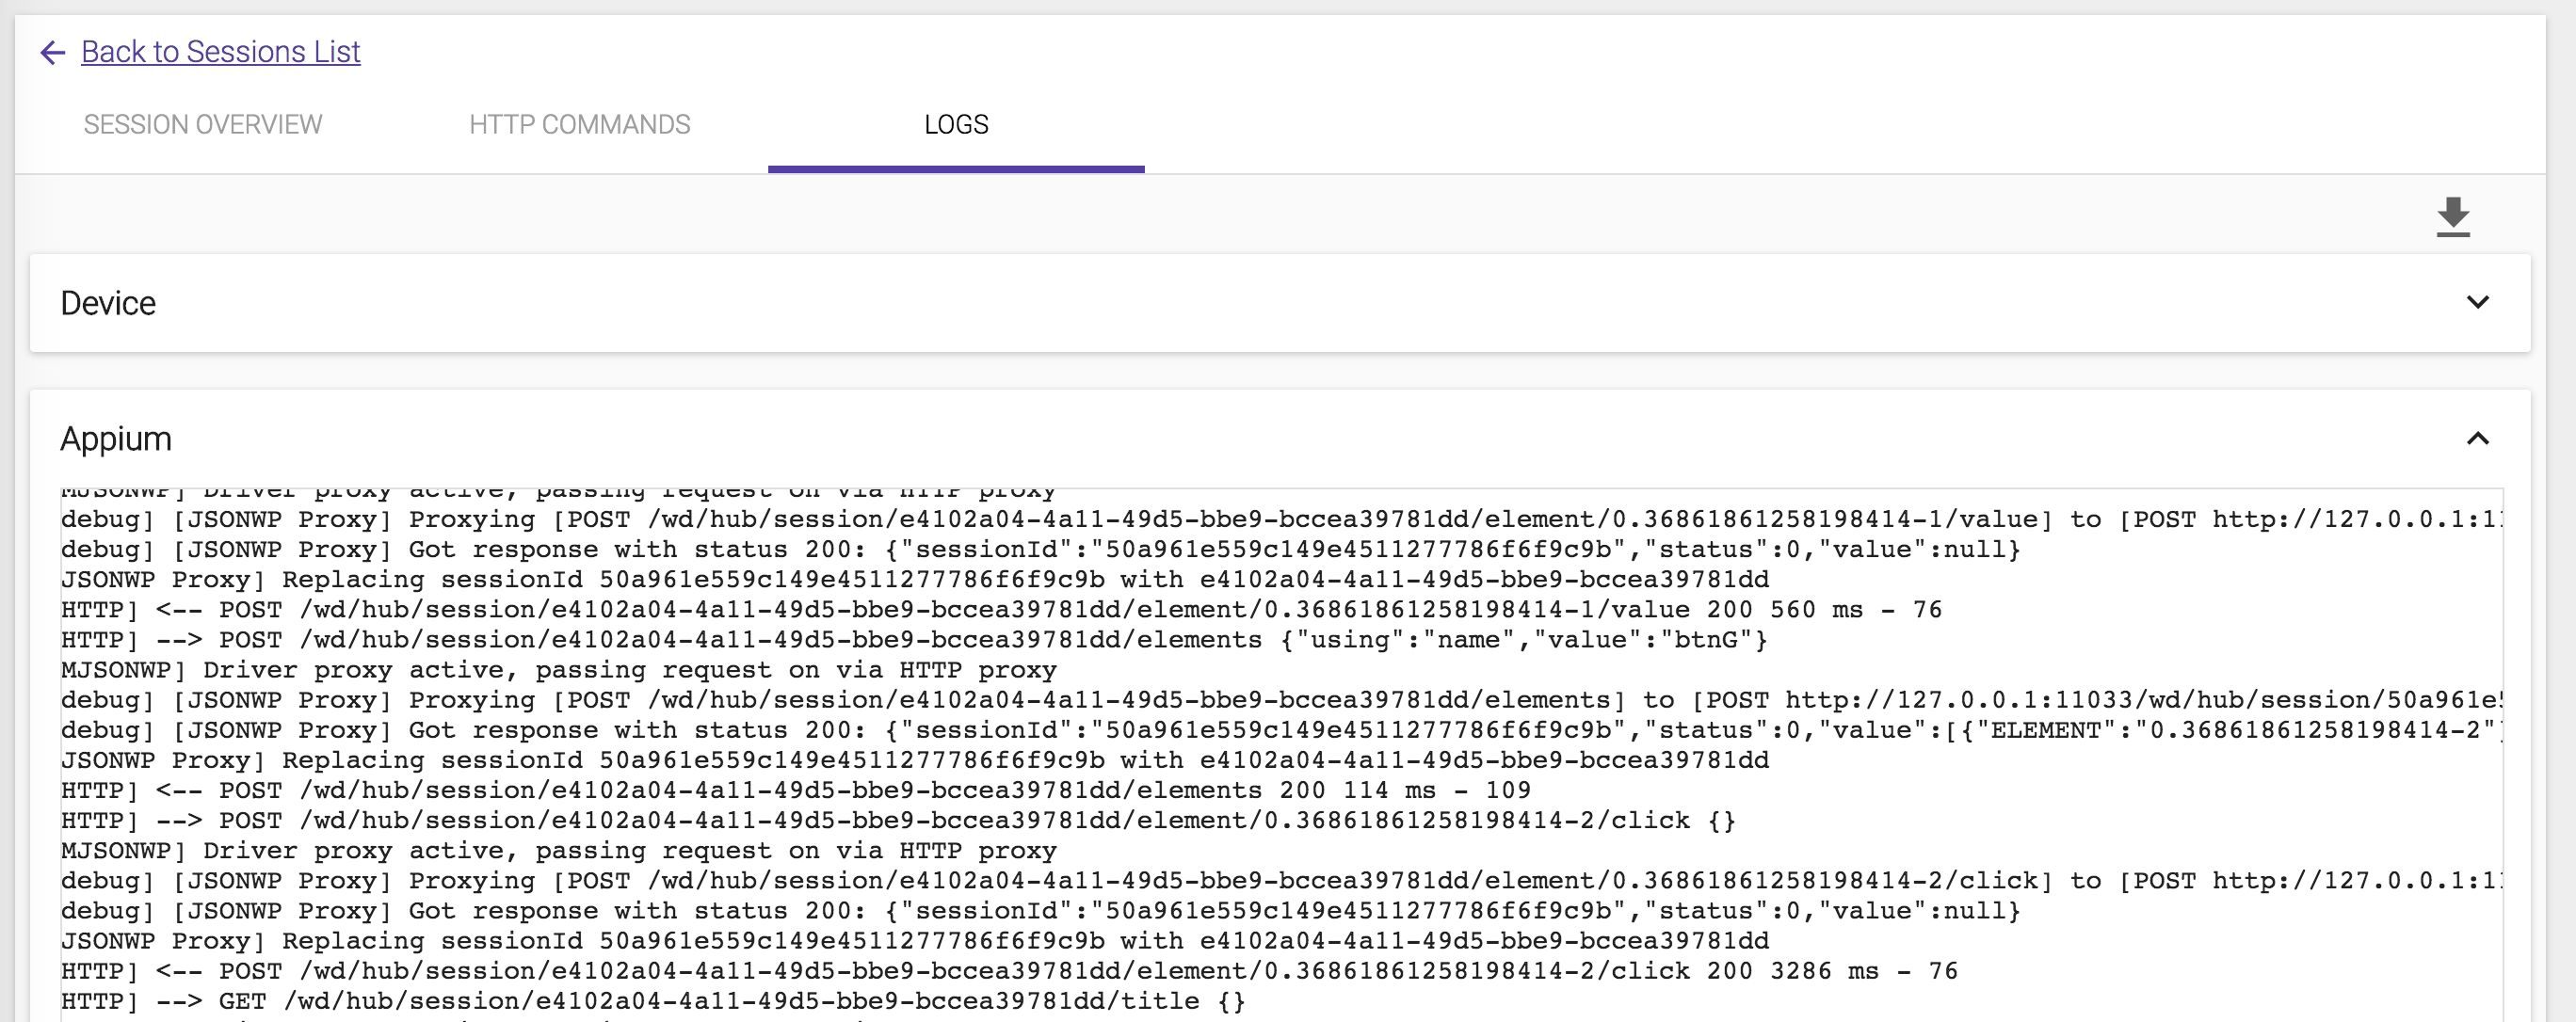
The log report includes device log and Appium log as well.
 https://github.com/khanhdodang/kobiton-sample

Leave a Reply